Page 1 of 3 123 LastLast
Results 1 to 15 of 43

Thread: Starting On A Couple Of New Tables

  1. #1
    Join Date
    Mar 2003
    Location
    Mequon, Wisconsin
    Posts
    471

    Starting On A Couple Of New Tables

    Hi Guys

    Rather than post a finished piece I figure I'll start an on going build thread. I recently acquired two slabs of spalted hard Maple. Both are the perfect size for coffee tables. Slab #1, the slightly larger of the two will be built for The Urban Wood Encounter Show in Milwaukee and is the first one I'll be working on. For this table I have decided to go with an origami inspired design for the base and carry it through to the slab. To get things moving I thought it best to stabilize the crotch split. Rather than use the typical butterflies or the slightly curved butterflies I've used in the past I decided to go with the theme and use origami inspired butterflies.

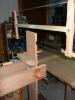
    In the photos below you'll see the slabs and a few butterfly designs I started playing with, and the design I ended up using for the first butterfly. Today I only had a chance to cut the first butterfly out of ebony. Hopefully next week I'll set it into place. I have other work going so I can't spend much time on these right now but I'll post as often as I can, every couple weeks or so.

    Stay Tuned :-)

    T1.jpgT2.jpgT3.jpgT4.jpg
    Last edited by Dale Osowski; 04-11-2013 at 11:04 PM.
    DJO Furniture Maker / Timberwerks Studio

  2. #2
    Join Date
    Aug 2007
    Location
    Dickinson, Texas
    Posts
    7,655
    Blog Entries
    1
    Wow!! I'm blown away.

    I would like to see details of making the butterflies. They look very precise. My thoughts lead to making a stick that has the shape machined and then slicing the butterflies from that stick. It would be a generous gesture on your part if you care to share that.

  3. #3
    Join Date
    Mar 2003
    Location
    Mequon, Wisconsin
    Posts
    471
    Thanks Lowell

    This one and the ones to follow are first drawn on paper and then double stick taped to the stock. For this one I simple cut the outside wing angles on the table saw with miter gauge, 60 deg. The rest of the cuts are done by hand via dozuki saw. This Butterfly is 13/16" thick Ebony The one I will use towards the wide end of split will be 1.5" stock, either Bocote or Rosewood. I't will be a bit different in shape and larger overall yet still origami inspired. I'll make sure to take photos of the process from drawing pad to cutting actual butterfly. Hope to get to that early next week .
    DJO Furniture Maker / Timberwerks Studio

  4. #4
    Join Date
    Nov 2007
    Location
    Goleta / Santa Barbara
    Posts
    969
    Gotta agree with Lowell:WOW.

    I have seen many traditional butterflies but never thought outside the proverbial box. Excellent, simply excellent.

    Looking forward to seeing a lot more from you.

    Thank you for sharing, Patrick

  5. #5
    Those are brilliant. Those slabs are beautiful. Watching with anticipation.

  6. #6
    Join Date
    Mar 2003
    Location
    Mequon, Wisconsin
    Posts
    471
    Thanks Guys!
    DJO Furniture Maker / Timberwerks Studio

  7. #7
    Join Date
    Mar 2003
    Location
    Mequon, Wisconsin
    Posts
    471
    Ok, the next step in the Auragami table build will be a little boring ;-) The left and right side of the slab are out of plane with each other by about 1/4", this of course is due to the crack. A butterfly alone won't solve this problem and I believe it best not to rely on the table base to pull each side into plane.

    What I plan to do is run a 3/4" diameter steel rod from one side to the other passing through the butterfly. This will be about a 32" total run to bore. I will enter from the left side. The bar end will be hidden by the the edge I cut off, bevel and glue back in place to mimic the folding of the slab.

    I'll tackle this later this week / early next. I'm a bit under the weather with a bad cold / flu at this time and I need to modify the drill bit extension a little to accept the boring bit. The photo should give you an idea of what will be done. The large butterfly the rod passes through will be Rosewood.

    Stay Tuned
    DJO

    IMG_3232.jpg
    DJO Furniture Maker / Timberwerks Studio

  8. #8
    Join Date
    Dec 2007
    Location
    Fishers, Indiana
    Posts
    554
    That's a beautiful slab of wood. Can't wait to see the butterflies in place.
    That would scare the hell out of me to drill a hole that long across the slab .

  9. #9
    Join Date
    Mar 2003
    Location
    Mequon, Wisconsin
    Posts
    471
    Feeling a little better today and had a little time to cut out the main butterfly from Rosewood. It's as large as my hand, no doubt the largest I've ever made.

    IMG_3235.jpg

    IMG_3236.jpg
    DJO Furniture Maker / Timberwerks Studio

  10. #10
    Join Date
    Dec 2010
    Location
    South Coastal Massachusetts
    Posts
    6,824
    I don't see how this will bring the two sides into plane.

    They'll get closer together, to be sure...
    but planar?

    I'm doubtful that this effort will produce results that might be achieved by stronger fixation to the base.
    Some deep kerfing underneath the "low" side before it's torqued into the same plane, perhaps.

    My expectation of this is that the table will rock, seasonally.

  11. #11
    Join Date
    Mar 2003
    Location
    Mequon, Wisconsin
    Posts
    471
    Quote Originally Posted by Jim Matthews View Post
    I don't see how this will bring the two sides into plane.

    They'll get closer together, to be sure...
    but planar?

    I'm doubtful that this effort will produce results that might be achieved by stronger fixation to the base.
    Some deep kerfing underneath the "low" side before it's torqued into the same plane, perhaps.

    My expectation of this is that the table will rock, seasonally.
    No worries, I've used this technique before :-) Eight years and the table is as flat as day one, no rocking. And this was only 3/8" diameter rod. If the wood is dried correctly and construction is sound there shouldn't be any issues.

    C1.jpg

    C2.jpg
    DJO Furniture Maker / Timberwerks Studio

  12. #12
    Join Date
    Mar 2003
    Location
    Mequon, Wisconsin
    Posts
    471
    Roughed out.

    IMG_3242.jpg

    IMG_3243.jpg
    DJO Furniture Maker / Timberwerks Studio

  13. #13
    Join Date
    Mar 2003
    Location
    Mequon, Wisconsin
    Posts
    471
    Starting on the cleanup. This is going to take awhile since the spalting and the crotch grain make for fragile wood.

    IMG_3245.jpg
    DJO Furniture Maker / Timberwerks Studio

  14. #14
    Join Date
    Mar 2003
    Location
    Mequon, Wisconsin
    Posts
    471
    Main butterfly is in place, next step is to drill for steel rod. The back view gives you an idea of what I was working with and why patience was needed. very tricky grain.

    IMG_3253.jpg

    IMG_3254.jpg

    IMG_3262.jpg
    DJO Furniture Maker / Timberwerks Studio

  15. #15
    Join Date
    Mar 2003
    Location
    Mequon, Wisconsin
    Posts
    471
    Success! The drilling went well, now it's time to glue in the butterfly and set the rod. This will be the last post for awhile since I want to set the slab aside and let it settle before final flattening. Below is a few photos of the drilling and how the rod passes through butterfly. Also pictured is a mock up of folded edge that will conceal rod end.

    IMG_3270.jpg

    IMG_3271.jpg

    IMG_3268.jpg
    DJO Furniture Maker / Timberwerks Studio

Posting Permissions

  • You may not post new threads
  • You may not post replies
  • You may not post attachments
  • You may not edit your posts
  •