Page 2 of 4 FirstFirst 1234 LastLast
Results 16 to 30 of 53

Thread: Ash Thinline Telecaster

  1. #16
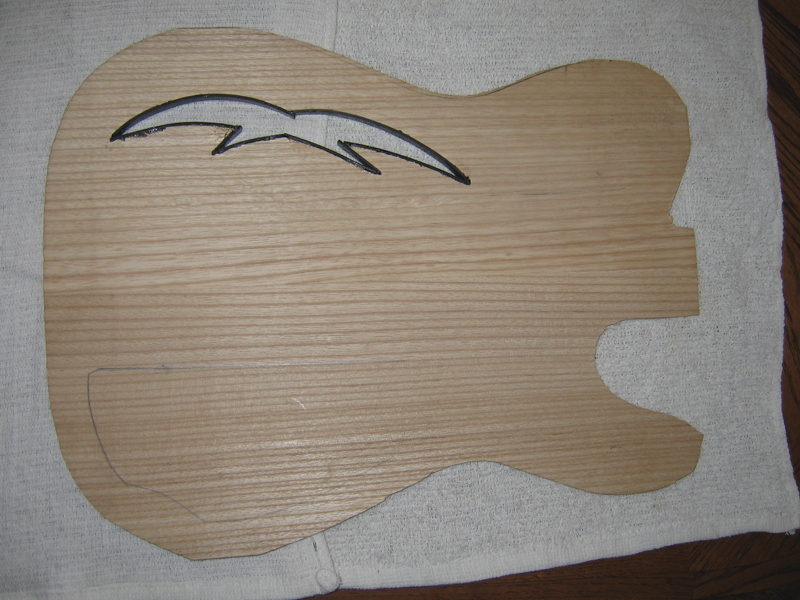
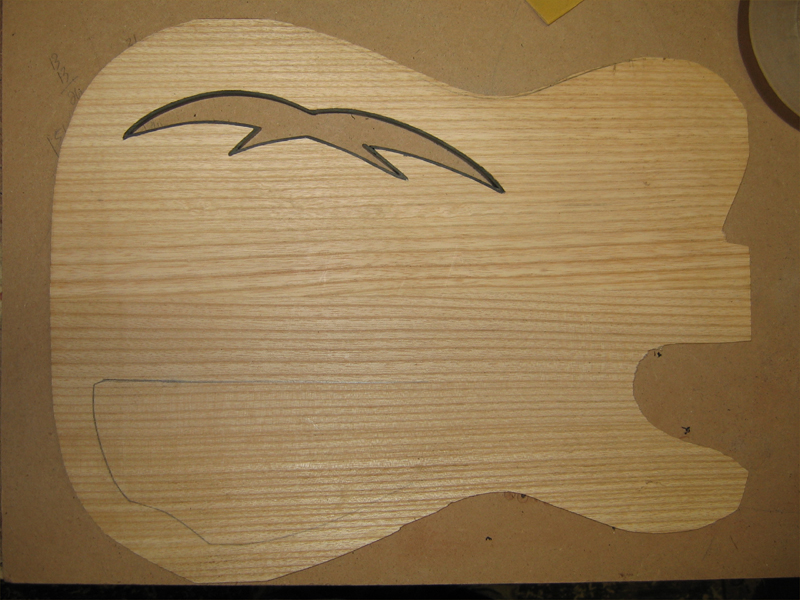
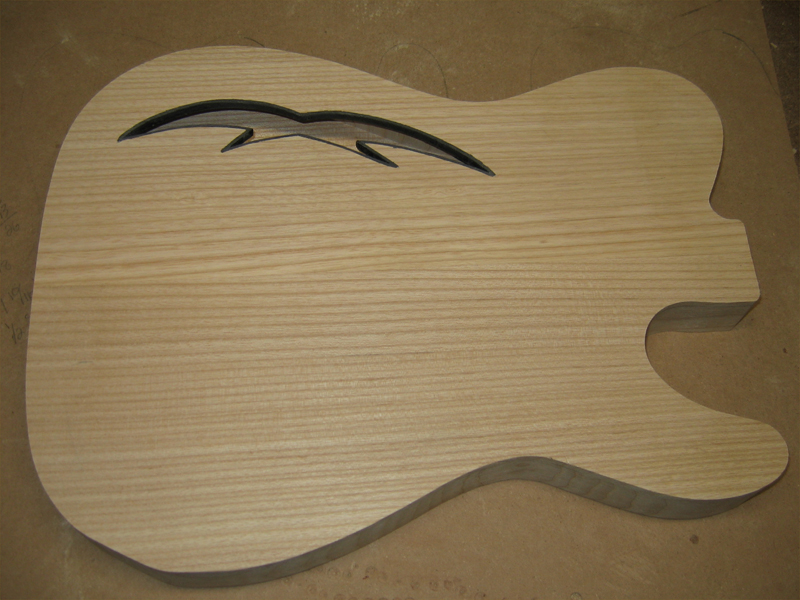
    I didn't take any pics of this process on my maple thinline, but I wanted to show my work this time.

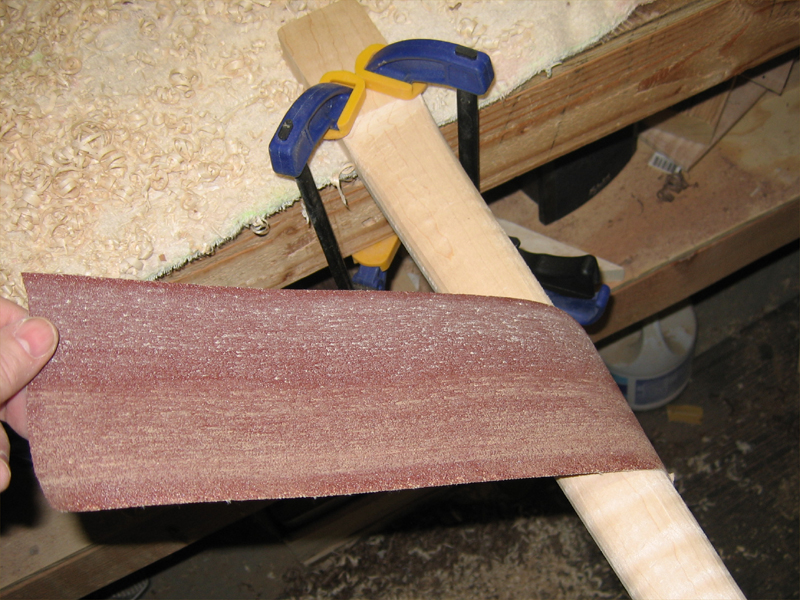
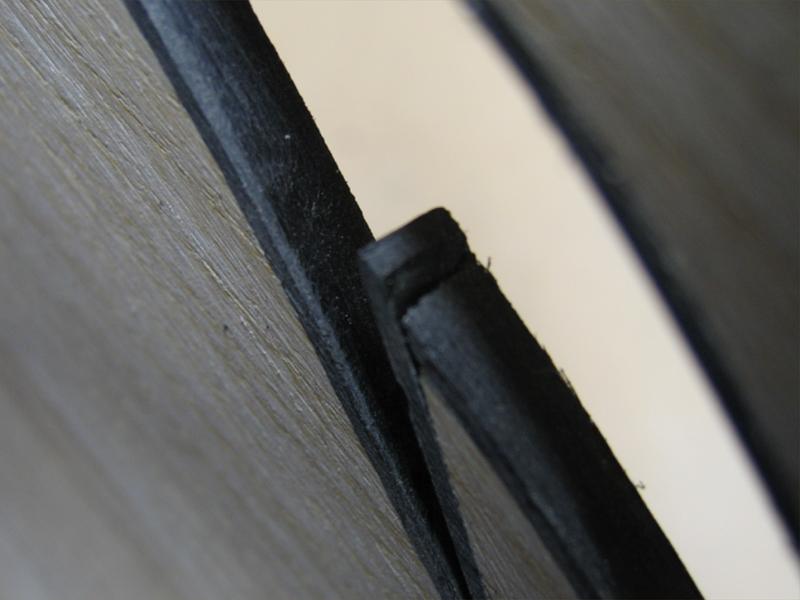
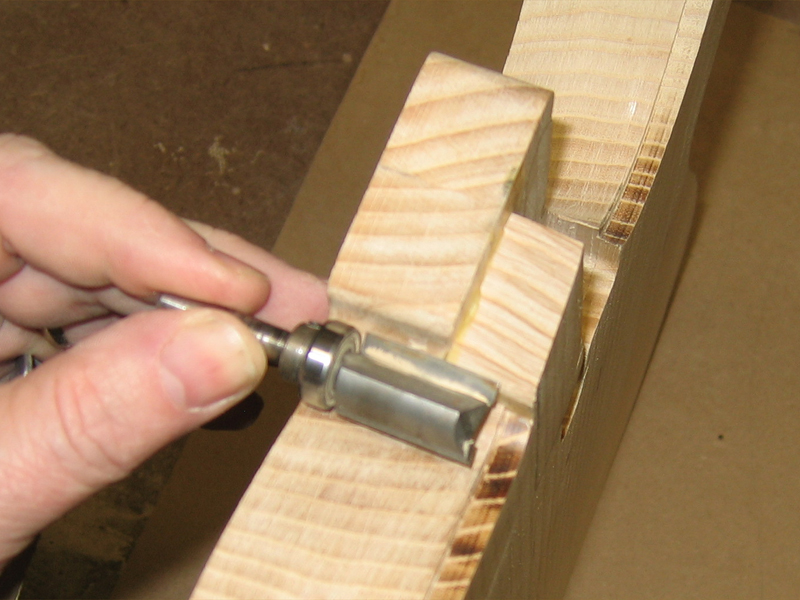
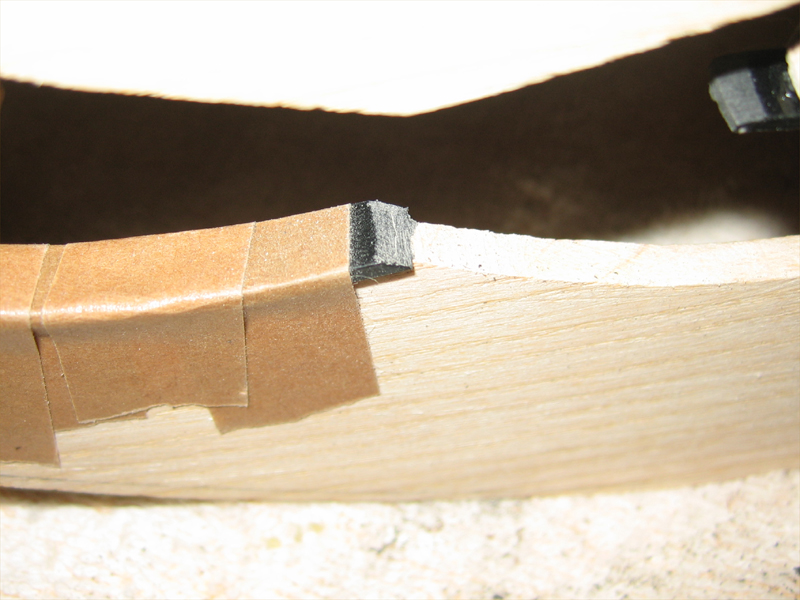
    The toughest part is getting the corners fitted tightly. The key is to place a small amount of cement on the end of the binding going into the corner. I let it "heat up" the binding...it melts it slightly...then I set it into the corner. This lets the binding form itself to the corner.

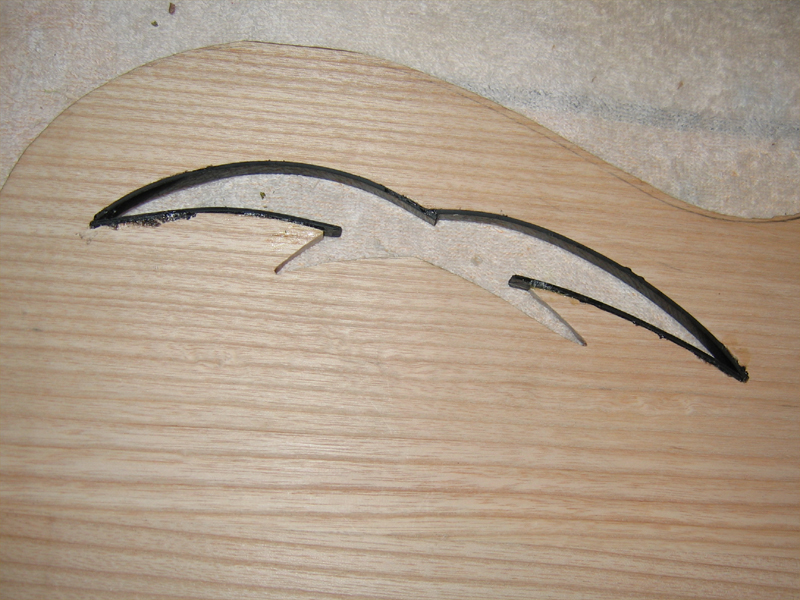
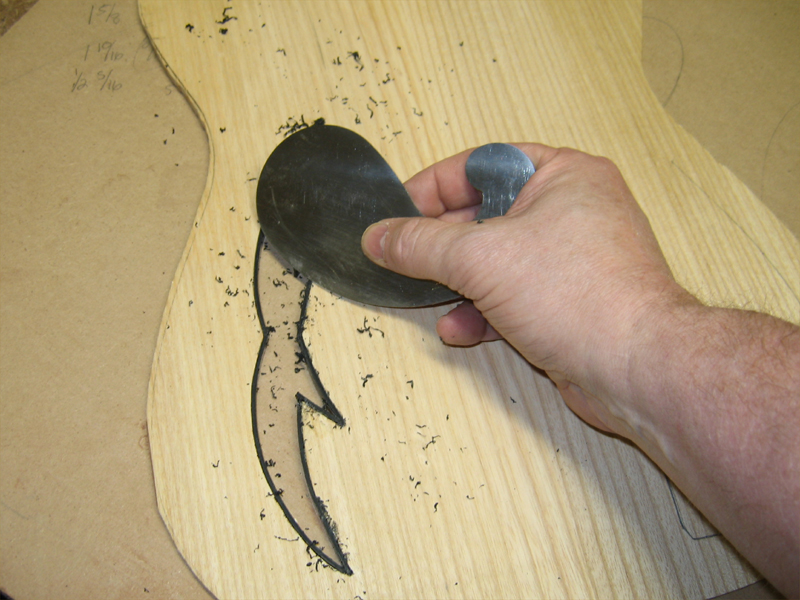
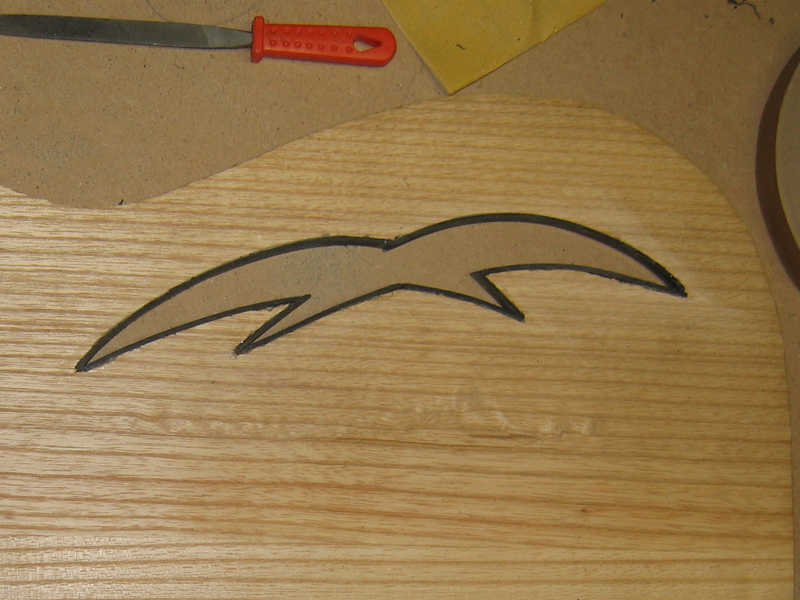
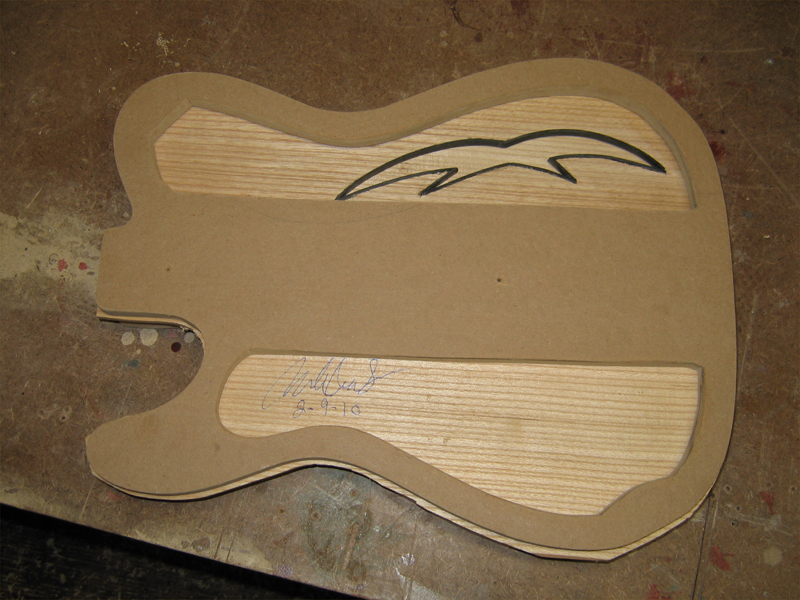
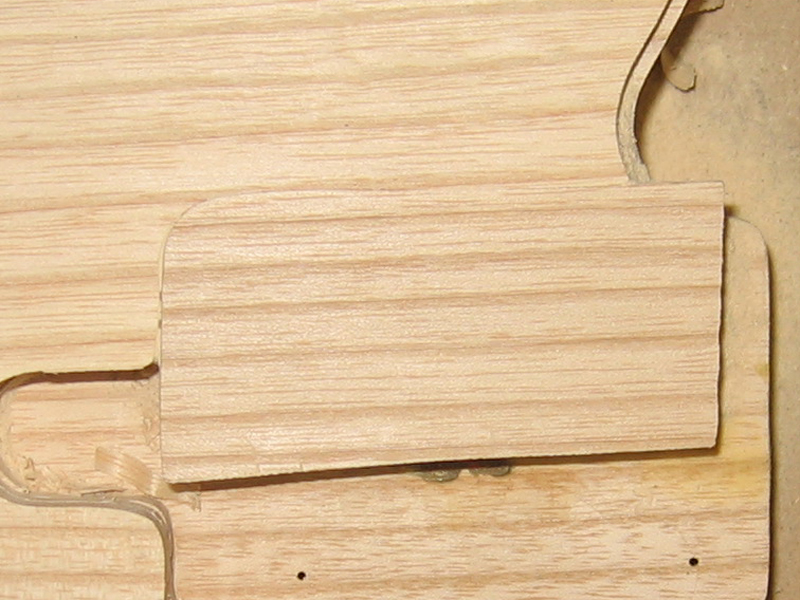
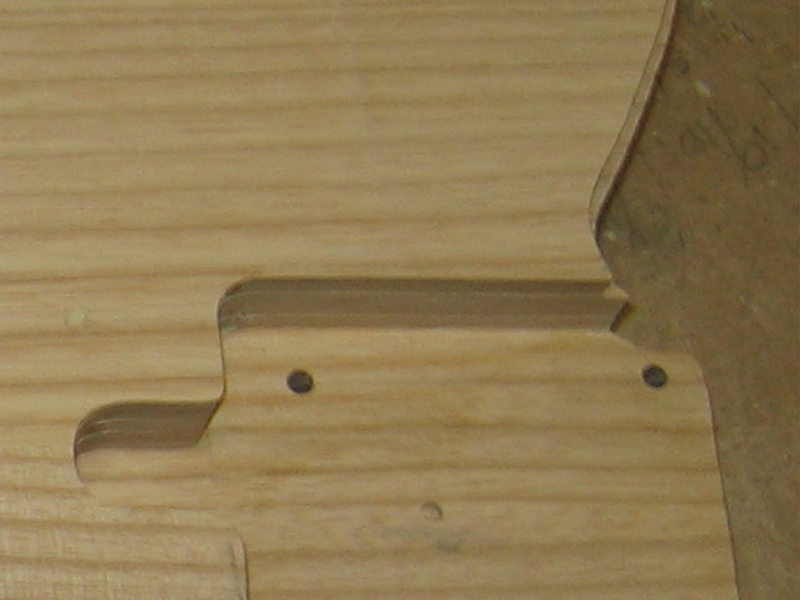
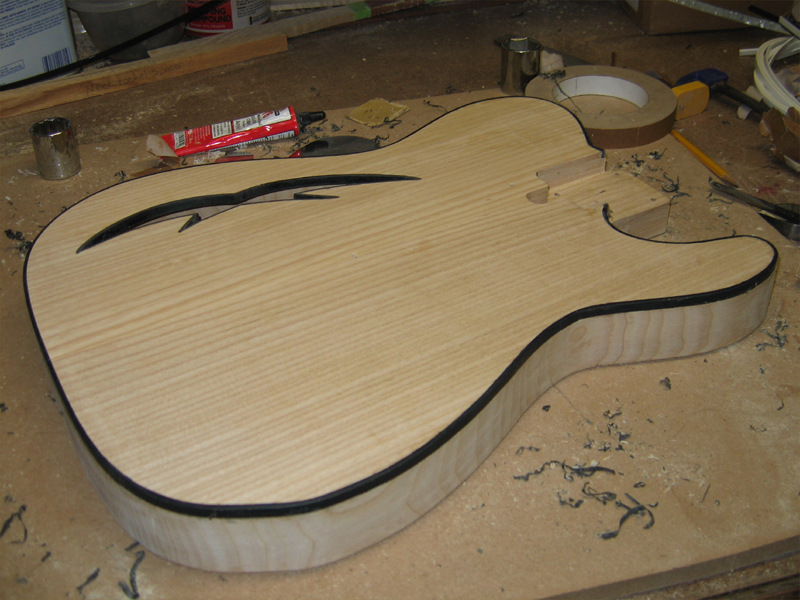
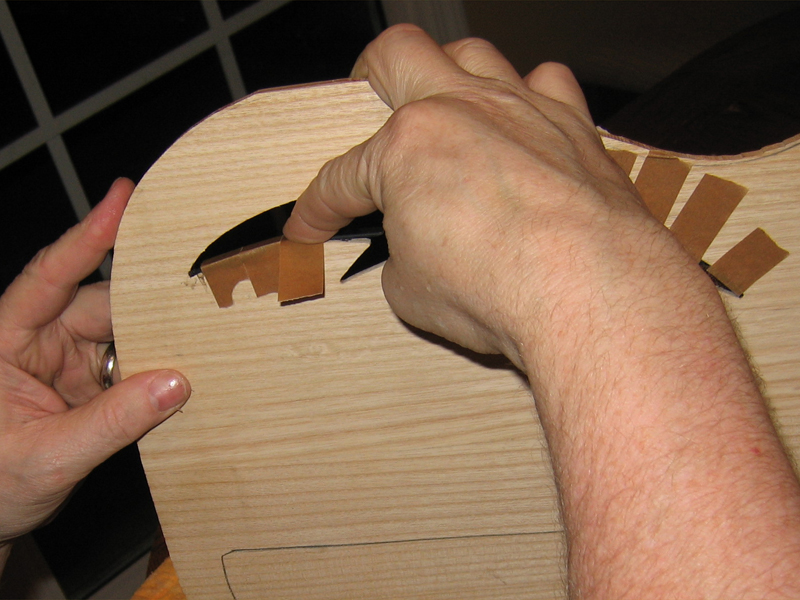
    Here's the first piece in place.


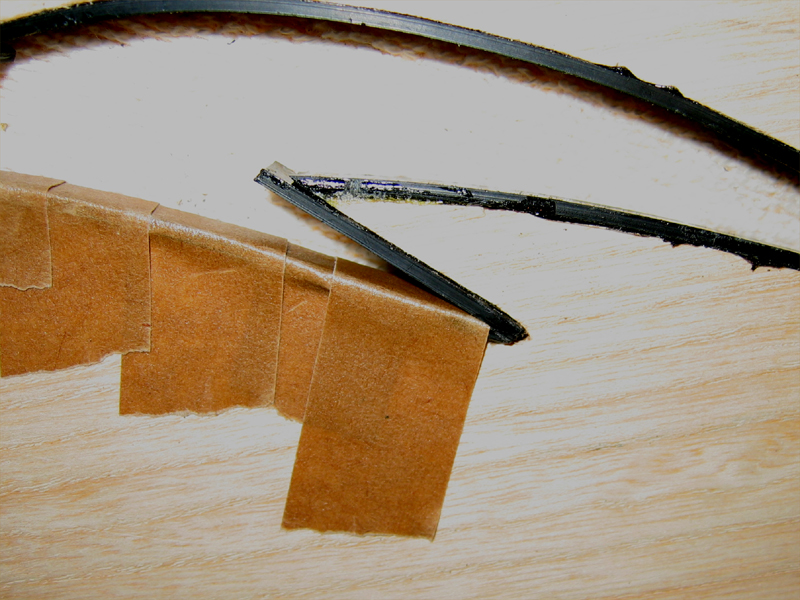
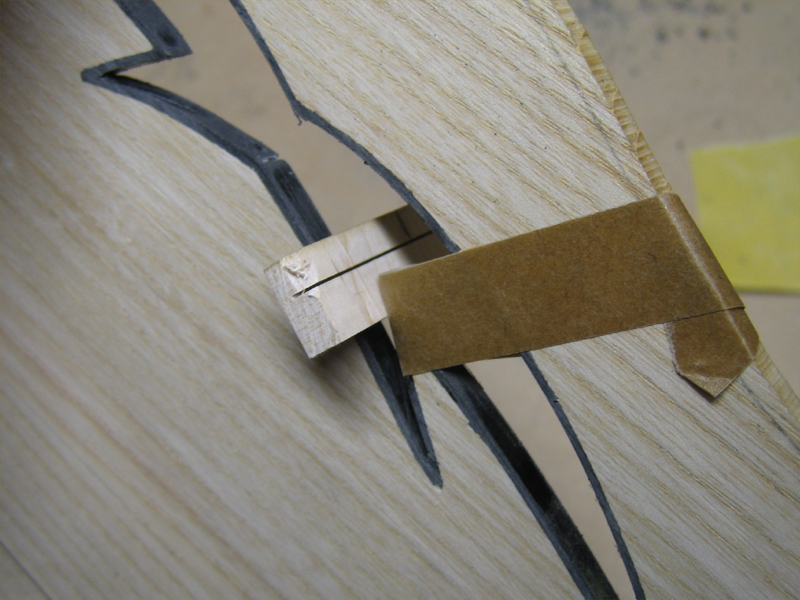
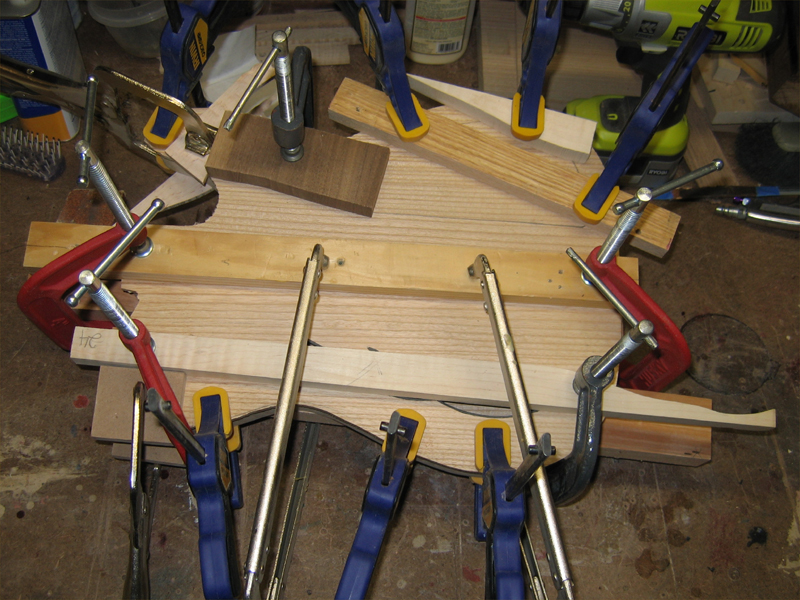
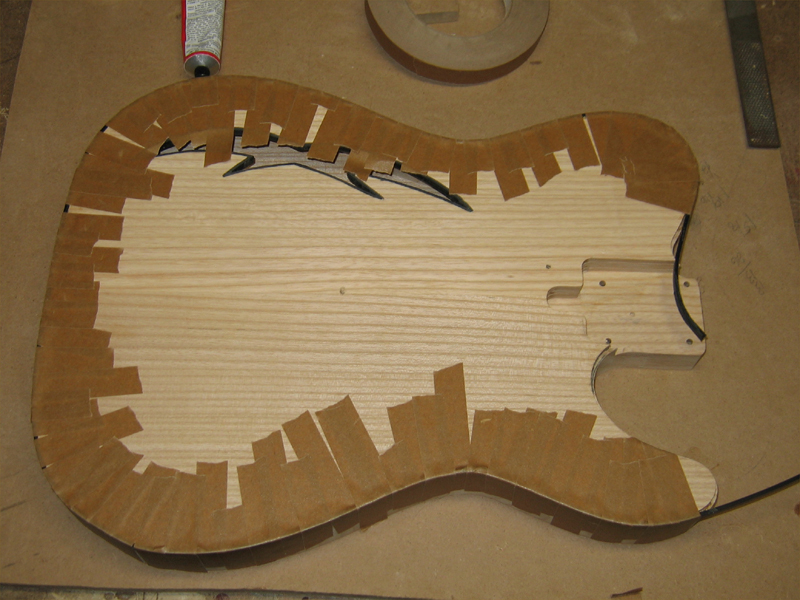
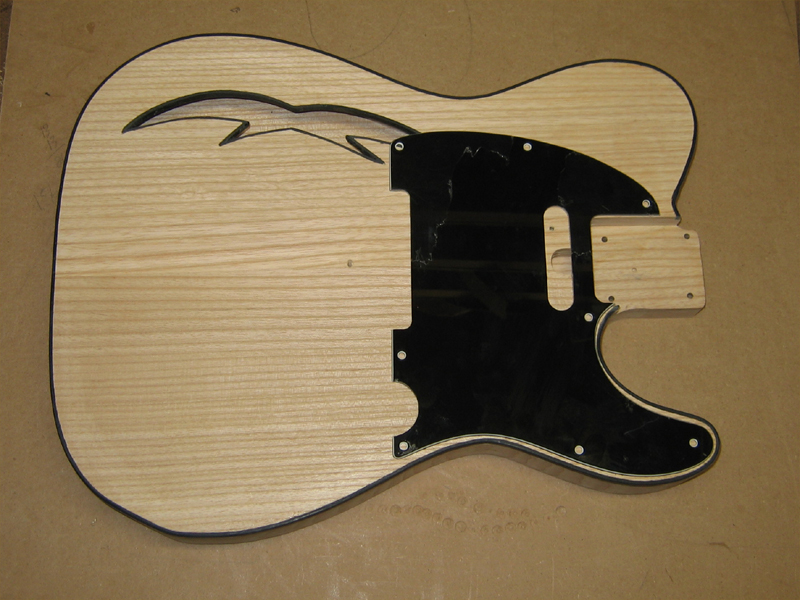
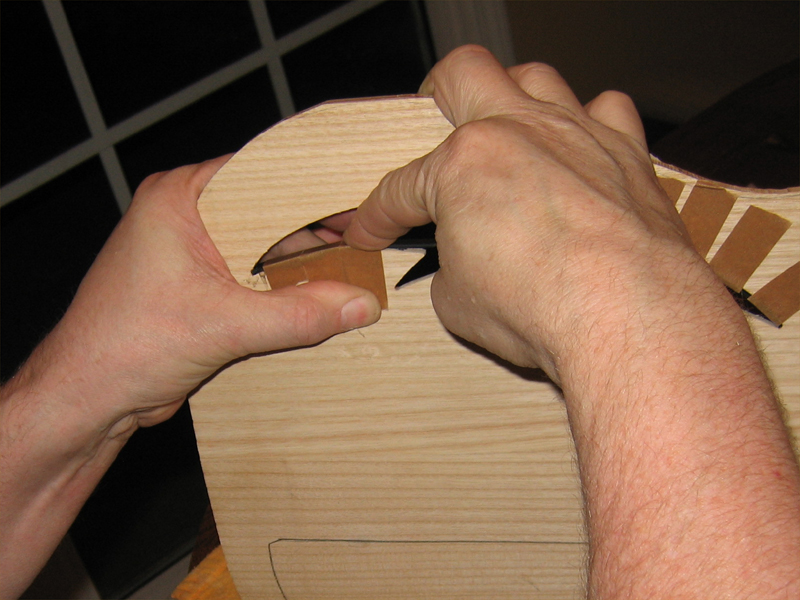
    My technique is to put pressure down on the piece...


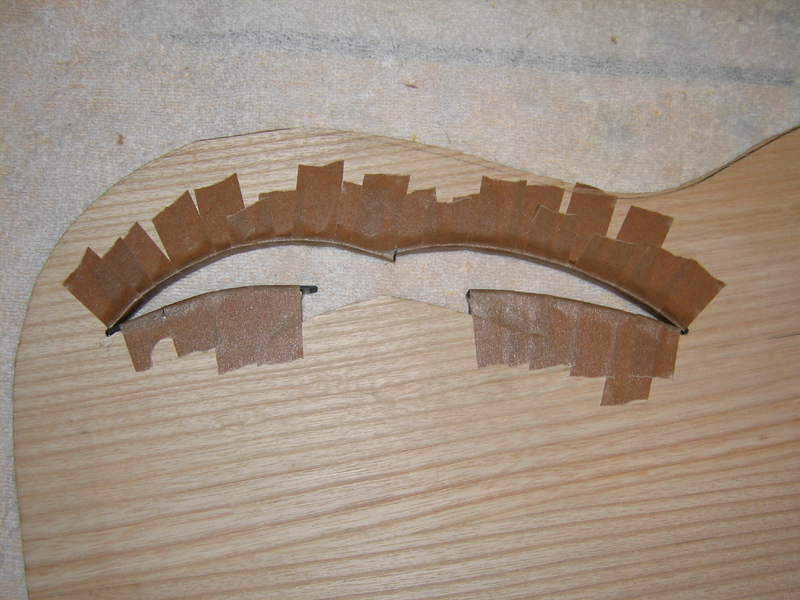
    Then smooth the tape down into place. I let the binding hang over each edge of the top, so just applying the tape from one side to the other, with wet cement under it, could cause it to slip one way or the other.


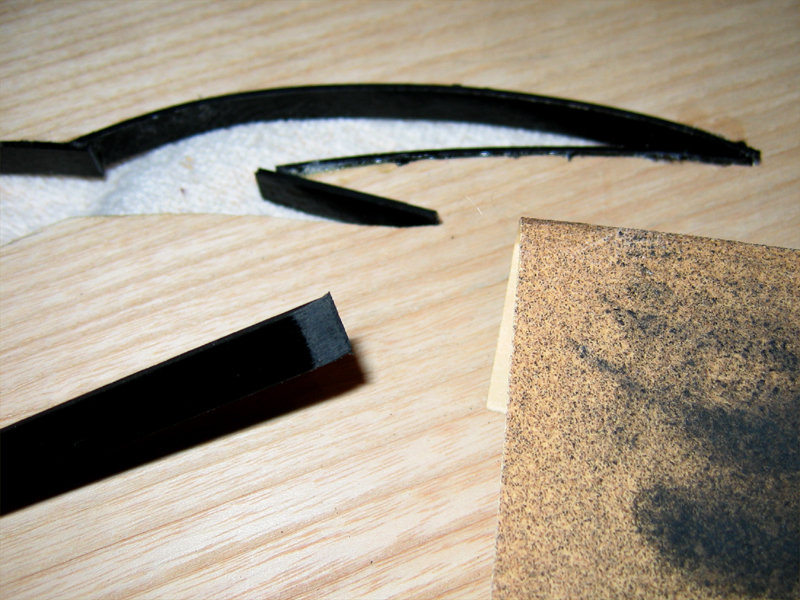
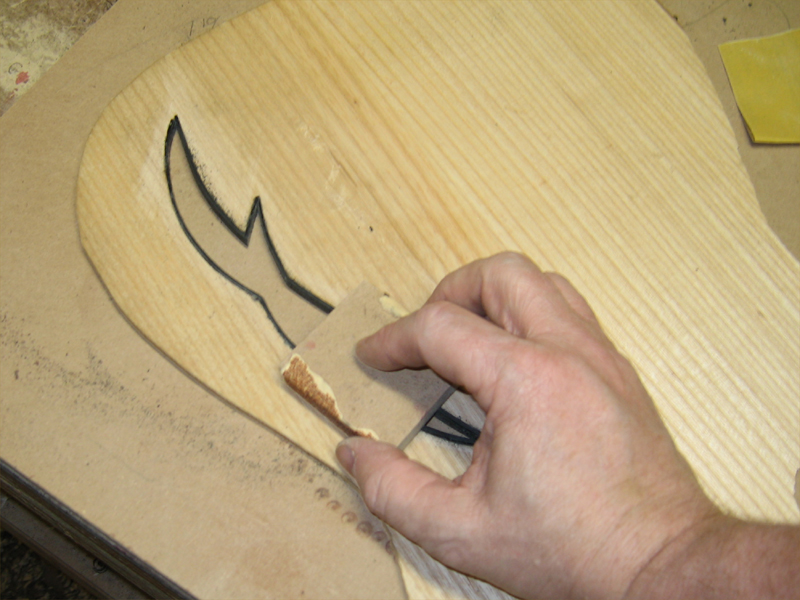
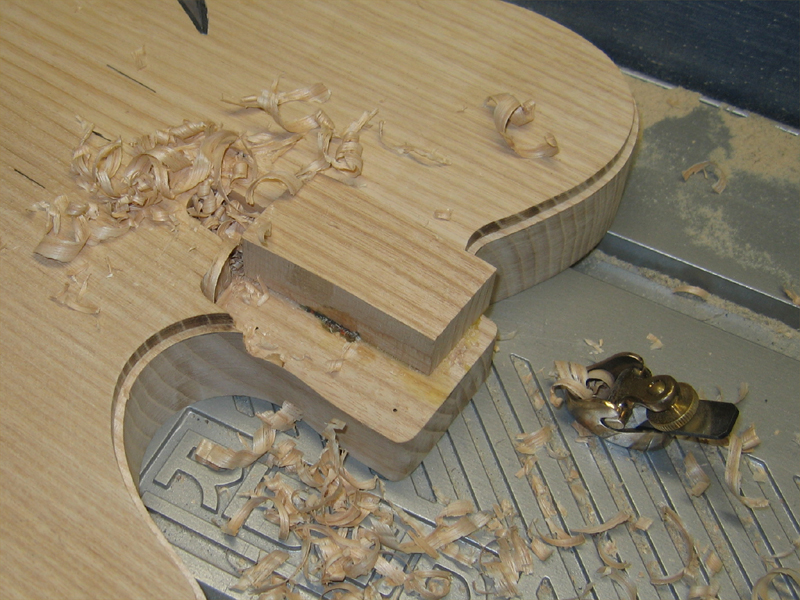
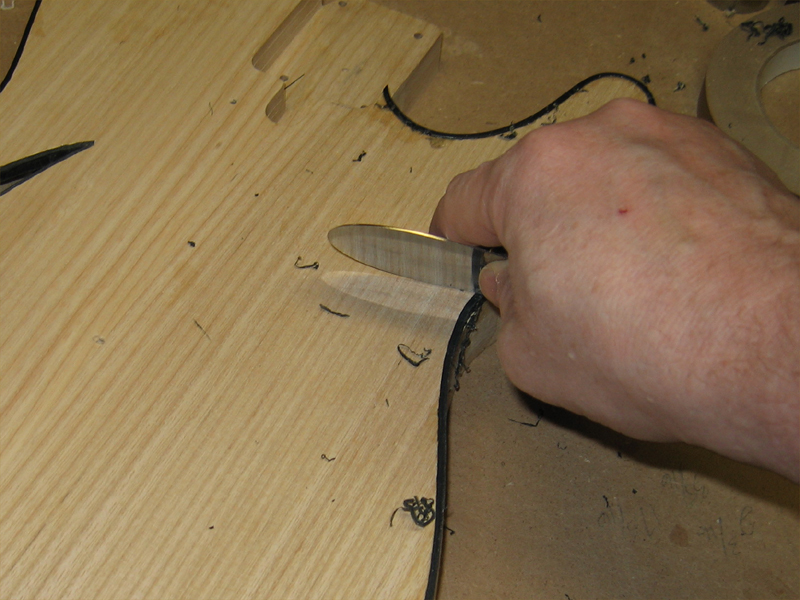
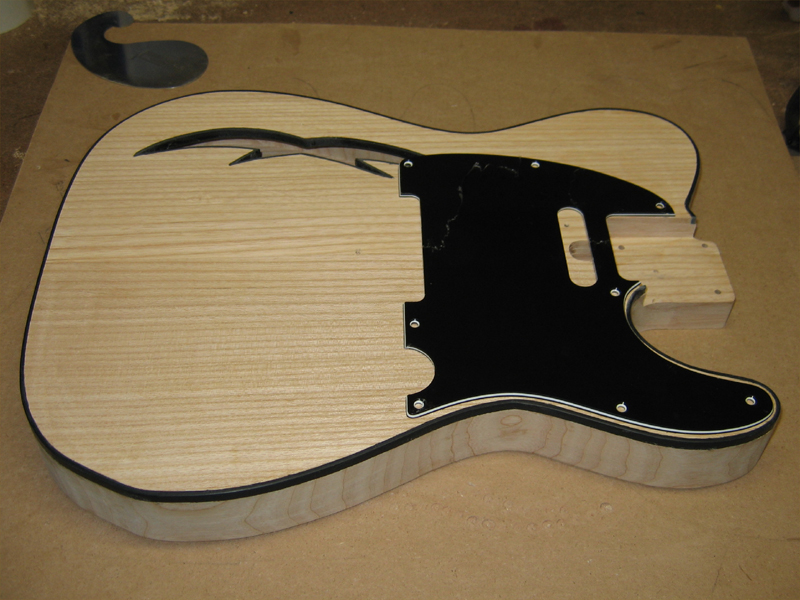
    Where the pieces will overlap, I cut and then sand the glued piece to follow the contour of the piece to be glued to it. Gluing a butt joint is tedious and difficult to get right. Doing it this way allows the next piece to simply lay down on top of the first. The direction and position of the joints doesn't matter as they will be invisible after touch up with binding paste later.
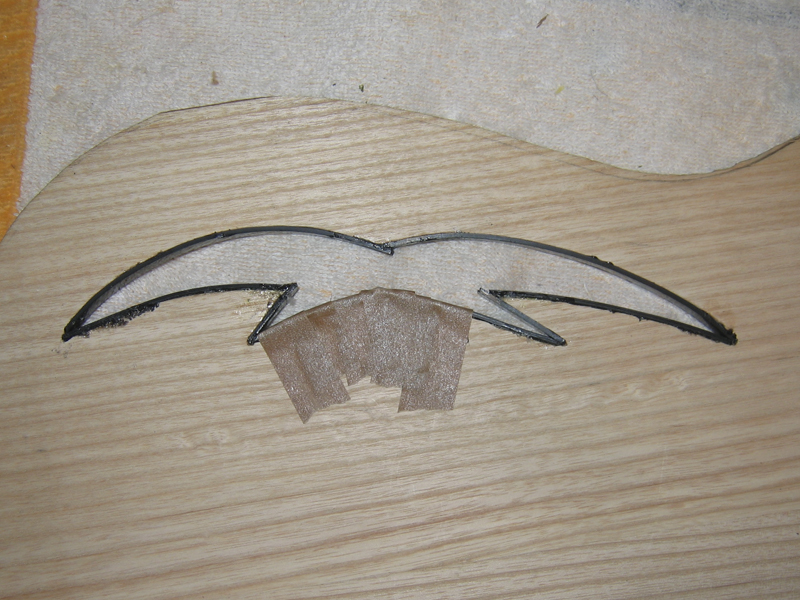
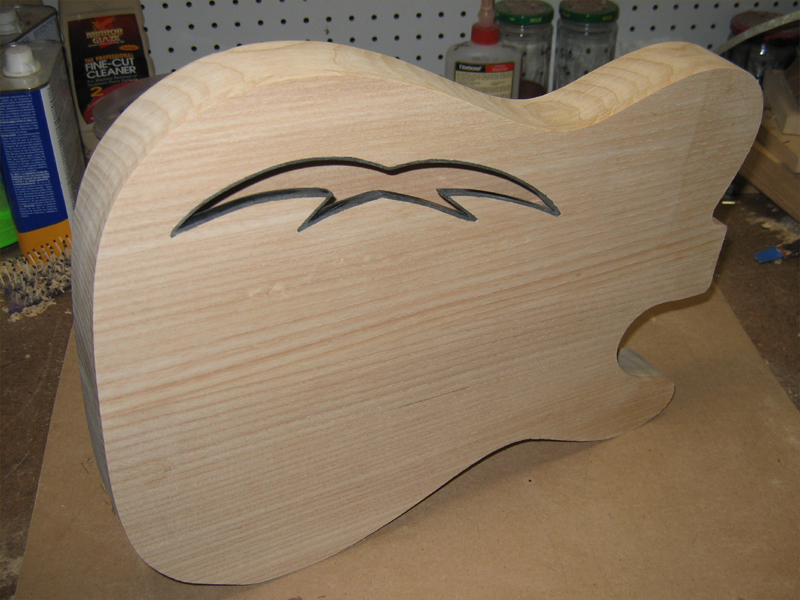
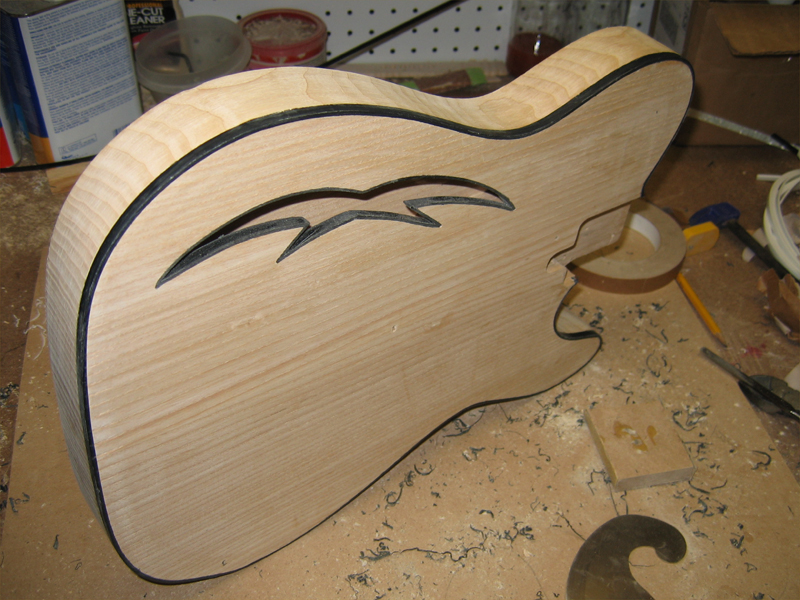


    A progress shot.

    "Thought that is no longer limited brings experience that is no longer limited" Marianne Williamson.

  2. #17
    With the tape off, it looks a bit scary amd messy but after the cement has set up, it will all scrape and sand out smoothly. You can see how the cement melts the binding. It takes a fair amount of care during gluing to make sure you don't get the cement on the surfaces that don't need it. If you do, it just means a bit of cleanup and sanding later. But if you can avoid it, all the better.


    Fitting the smaller corners takes an additional step of mitering the binding. A block with some 120 grit makes this easy. I take my time until I get a good fit. I hold the top up to a light to see how well I'm fitting the two pieces together.


    A nice, tight corner here...but even if there's a gap in there, no problem. I can fill it later. It will disappear with no problem.

    "Thought that is no longer limited brings experience that is no longer limited" Marianne Williamson.

  3. #18
    Join Date
    May 2005
    Location
    SE South Dakota
    Posts
    1,538
    I'm drooling!! This is as bad as waiting on Christmas to arrive

    Bruce

  4. #19
    A couple more shots of the binding process.

    Here it is with all but the last piece in place.


    I put the last piece in place. This is a different type joint than the rest. I wanted it to have natural peak to it vs being overlapped by the last piece. I had to pull up the end of the previous piece, but it laid right back down after a bit of glue clean up.


    All the tape is off and it's ready to be scraped and sanded...well, it will be by the time I get home from work this evening. Then, I can finally get this top glued on...even though QS wood is less likely to warp, I've been keeping it weighted down so it doesn't turn into a potato chip on me. So far, so good.


    Peace,
    Mark
    "Thought that is no longer limited brings experience that is no longer limited" Marianne Williamson.

  5. #20
    Join Date
    Dec 2009
    Location
    Vadnais Heights, MN
    Posts
    1,607
    Quote Originally Posted by Mark Crenshaw View Post


    If you have a belt sander, save the belts after they've seen the end of their use on the sander. They're great for hand sanding too. The strong backing makes them ideal for sanding the backs of necks, using on sanding blocks and other uses.


    Where do you get the double sided sanding belts?

    As always Mark, another informative post. I like how you over come the little mistakes and improvise along the way.

    Doug

  6. #21
    Join Date
    Aug 2004
    Location
    Baltimore, Md
    Posts
    1,785
    OMG Mark you're killin' me ! I haven't even begun the 59 yet. I have to finish up a couple of more projects before I can. I need to focus.....focus.


    Looking great though !
    "The element of competition has never worried me, because from the start, I suppose I realized wood contains so much inspiration and beauty and rhythm that if used properly it would result in an individual and unique object." - James Krenov


    What you do speaks so loud, I cannot hear what you say. -R. W. Emerson

  7. #22
    I finished up the vent binding this evening. I used a cabinet scraper to level the binding on the front of the top.


    Then blocked it with some 120 grit.


    Looking better...


    The back side wion't be taken flush with the wood because I want it to appear a bit taller than the top is thick. So I blocked it enough to level the edge. Then I cleaned up any glue that squeezed out on the top.

    "Thought that is no longer limited brings experience that is no longer limited" Marianne Williamson.

  8. #23
    I had a joint that wasn't pulling together so I needed to clamp it separately. I added a thick drop of cement and then taped it up. I also added a small block of wood to keep pressure on it until it set up.


    Here it is after a bit of shaping. It still needs some work but any pits that are left will be filled with binding paste later.


    It's time to glue this baby up. I've been waiting fo this. It's the completion of the design change that I made early in the project...from solid body to chambered body.

    Before I glued it up, I signed the underside of the top...had to lay the template on to make sure I was igning in the right place.


    Clampzilla!!!

    "Thought that is no longer limited brings experience that is no longer limited" Marianne Williamson.

  9. #24
    All trimmed up with a flush trim bit. Now that it's an actual body, I can move on to routing.


    Well, I had a bit of a set back, and I wasn't sure I wanted to share it with the world but on the chance that someone might benefit from my mistake...

    While I was routing the neck pocket, the double stick tape holding the template released and the bit gouged the bass side of the neck pocket. Heart breaking when you raelize what's happened but it presents an "opportunity" to learn and grow my skill set.

    Like I said, I wasn't going to post this so I didn't take any pics until this point in the repair.

    I started by blocking the side of the pocket flat. Then, I took my time and hand shaped the patch until it fit perfectly...as close as I could get it anyway. I wasn;t worried about the back of the pocket so much as the side.

    Here you see the patch already glued in place and being planed down flush with the top. I took it to within a 1/16th or so and then hand blocked it flush.


    There were several routing operations that neede to be done. This patch affected the profile of the body, the neck pocket and the binding channel. I could have used a flush trim bit from the front but since the back of the guitar offered the most support, I decided to use a pattern bit.


    Taking my time and making a few passes. This shot is after the first pass.


    And after the second one to complete it.

    "Thought that is no longer limited brings experience that is no longer limited" Marianne Williamson.

  10. #25
    With the template clamped in place, I recut the pocket very slowly...I think I did 4 passes to remove the 5/8" of material. You might be able to see that I set the template back about 1/32" so the router would recut the back of the pocket also...remember, I put my efforts in matching the side of the pocket with the patch. And while it's not a bad match, I wanted to remove any gap that might remain. The pocket is 1/23" longer than spec, but that's easily made up in the bridge location/adjustment.


    The patch is virtually invisible. Patience really pays off on something like this. And I didn't do it the same evening that the slip occurred...I took some time away from the problem and came back in with a fresh perspective.


    So, with that taken care of, I moved on to the binding. This is a nice, simple task in contrast to the neck pocket adventure. Just the small radius to go and I can get them scraped and leveled.


    "Thought that is no longer limited brings experience that is no longer limited" Marianne Williamson.

  11. #26
    After pulling all the tape, it's time to scrape.


    A quick pass with a scraper takes the binding flush with the top and sides.


    It's looking prett good considering the mis-steps this project has taken. I'm really liking the black binding.


    "Thought that is no longer limited brings experience that is no longer limited" Marianne Williamson.

  12. #27
    In fact, I like the black so much that I'm thinking about altering a stock PG to enhance the vent and the overall look of the guitar...just thinking about it at this point. I'll have to jump into Photoshop and see what I can come up with.

    Here's a tease...


    A few hours later...

    OK, I took a little time to mock up some PG looks. Some of these are a bit out there but a couple have potential. Maybe it just needs binding around the neck pocket like #9.

    I've shown them all with a control plate but I think back loaded controls would look better on a few of the designs. Right now I'm leaning toward 1, 2, or 8. What do you think?


    Peace,
    Mark
    Last edited by Mark Crenshaw; 02-15-2010 at 7:13 AM.
    "Thought that is no longer limited brings experience that is no longer limited" Marianne Williamson.

  13. #28
    Join Date
    Feb 2003
    Location
    Yorktown, VA
    Posts
    2,756
    Nice recovery Mark! Glad to see you back on track. I really like the black binding too. PG's....I like 4 and 8.
    Last edited by Ted Calver; 02-14-2010 at 2:26 PM.

  14. #29
    Join Date
    Dec 2009
    Location
    Vadnais Heights, MN
    Posts
    1,607
    I like the black banding as well. I think it will look really good when done.

    I think #6 and #8 are the best.

    JMO,
    Doug

  15. #30
    Join Date
    Dec 2009
    Location
    San Francisco Bay Area, CA
    Posts
    261
    Wot mistake?

    Yup, I know the feeling when router templates slip. But you're right - wander away, watch some TV, or play with the dog. Come back with a fresh mind, and all will be good.

    I like the coverage of #8, but if its upper right matched the curve of the body's upper right, I think it would be a winner; similar to the way #1 follows the guitar's waist/hip.

    Nice, nice, nice. Same for the walnut build.

    Cheers,

    Seth
    Play drums!

Posting Permissions

  • You may not post new threads
  • You may not post replies
  • You may not post attachments
  • You may not edit your posts
  •