Page 5 of 9 FirstFirst 123456789 LastLast
Results 61 to 75 of 121

Thread: Armoire Progress

  1. #61
    Join Date
    Feb 2003
    Location
    Just outside of Spring Green, Wisconsin
    Posts
    9,442
    Cookin' with gas there, Jim! Great progress! Got any K-Bodies left over after that glue-up? Also, do you use any biscuits or splines, T&G or such for your panels? I'm also glad to hear that the chip collector worked so well. I picked one up for my PC690 some time ago, but always forget to try it out when doing edge routing. You've inspired me! Keep us posted on progress!
    Cheers,
    John K. Miliunas

    Cannot find REALITY.SYS. Universe halted.
    60 grit is a turning tool, ain't it?
    SMC is totally supported by volunteers and your generosity! Please help if you can!
    Looking for something for nothing? Check here!

  2. #62
    Join Date
    Mar 2003
    Location
    SE PA - Central Bucks County
    Posts
    65,885
    John, no biscuits...just glue and clamps. And that's about half of my 24" K-Bodies plus two 18" UniClamps. (I will likely pick up more of those as they are great for light duty clamping and are a lot less expensive than the 12" K-bodies) The case back for this project is T&G, but I cheated and bought the stuff...

  3. Jim, it is looking great. I'm getting anxious to see the final product. Do you think you could fast forward a bit so that I can see the end of this here project? OH by the way, I will be out of town when you are moving it upstairs... Sorry...
    Big Mike

    I have done so much with so little for so long I am now qualified to do anything with nothing......

    P.S. If you are interested in plans for any project that I post, just put some money in an envelope and mail it to me and I will keep it.

  4. #64
    Great progress Jim...can't wait to see it finished and sorry, but I'm glad I'm not your neighbor...that thing looks HEAVY!!

  5. #65
    Join Date
    Mar 2003
    Location
    SE PA - Central Bucks County
    Posts
    65,885

    Sat, 30 October 2004 Progress Update

    A few important steps were completed on the armoire project today and I hope to continued that trend tomorrow. I'd like to get this piece completed in the next couple of weeks, but it will require some diligence in getting out to the shop at times other than the weekends as next weekend I'm helping to man the Mini Max booth at Woodworks 2004 in Ft Washington PA and the following weekend I have to fly for business on Sunday. I'll use the picture descriptions below to describe the doin's.

    Pics
    1. Milling the back of the door panels so they fit into the grooves provided in the rails and stiles. I'm using a 22º Shaker style cutter which adds a nice shadow line on the interior of the doors.
    2. Dry fitting the doors. While the upper and lower panels came from different boards, I was able to get a reasonable grain match that approximates a continuous grain pattern top to bottom. The right way to do this is to use the same boards...but that wasn't possible this time around. I'm reasonably pleased with the results and once the dye is applied the minor variations will become less obvious than they are "bare".
    3. After cutting the dovetails for the drawers (with the Leigh this time...), I did a dry fit into the cabinet. "Just right" for my purposes. Notice that the fronts are one continuous board in keeping with that important design aspect.
    4. Testing the dye. The piece in the foreground has just the dye on the left and the dye topped with a coat of garnet shellac on the right. Nice. Just the hue I'm looking for to work will the wide pumpkin pine flooring in that guest bedroom.
    5. Since there are no false fronts on the drawers and I happen to like the look of the drawer face matching the casework and the rest of the drawer being natural, I need to plan for assembling the drawer boxes after dying the front. By carefully clamping the front and each side to the workbench in a dry-fit, I was able to pre-sand the dovetail joints prior to assembly and then dye just the front. This is a test example of how that will work out.
    More tomorrow...
    Attached Images Attached Images

  6. Good color, cool solution

    The color is great. I look forward to seeing the piece in place. The floors must have a rich mellow color. Ingenious way to finish the drawer fronts and not the sides. I learn so much at the Creek and occasionally it is something useful like this . Really excellent. Do hurry along, this is a good book but I am ready for the happy ending...

    By the way, alcohol or water based dye?
    Last edited by Michael Stafford; 10-30-2004 at 8:22 PM. Reason: afterthought
    Big Mike

    I have done so much with so little for so long I am now qualified to do anything with nothing......

    P.S. If you are interested in plans for any project that I post, just put some money in an envelope and mail it to me and I will keep it.

  7. #67
    Join Date
    Mar 2004
    Location
    Toronto, Ontario, Canada
    Posts
    3,789
    It looks REALLY GOOD Jim. You say that you are reasonably happy with the results of the pattern matching. If it were me, I would be VERY HAPPY.

  8. #68
    Join Date
    Aug 2004
    Location
    Baltimore, Md
    Posts
    1,785
    Jim,


    Awesome matchups looking REAL good. BTW I didn't see it in here what wood are you using ? Also your avatar, it's wiggin me out !


    Keith

  9. #69
    Join Date
    Mar 2003
    Location
    SE PA - Central Bucks County
    Posts
    65,885
    Quote Originally Posted by Keith Christopher
    BTW I didn't see it in here what wood are you using ?
    Somewhere early on I mentioned it's poplar off our property...getting to the end of it and this has enough knots to emulate pine quite nicely...without buying pine.


    Also your avatar, it's wiggin me out !
    Happy Halloween!! 
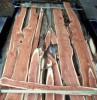
And if you look closely...the wig is quite missing...

  10. #70
    Very, very nice, Jim. I really like the contrast of the dovetailed drawers.
    "On Wednesday, when the sky is blue,
    And I have nothing else to do,
    I sometimes wonder if it's true
    That who is what and what is who."


    (A.A. Milne, Winnie the Pooh)

  11. #71
    Join Date
    Dec 2003
    Location
    Laguna Beach , Ca.
    Posts
    7,201
    Jim,

    It is really looking great! Excellent work, beautiful dovetails! The project is coming along beautiful!
    "All great work starts with love .... then it is no longer work"

  12. #72
    Join Date
    Feb 2003
    Location
    Just outside of Spring Green, Wisconsin
    Posts
    9,442
    Cruising along quite nicely there, my friend! Really love the staining and detail on the dovetails. Very well done!
    Cheers,
    John K. Miliunas

    Cannot find REALITY.SYS. Universe halted.
    60 grit is a turning tool, ain't it?
    SMC is totally supported by volunteers and your generosity! Please help if you can!
    Looking for something for nothing? Check here!

  13. #73
    Join Date
    Mar 2003
    Location
    SE PA - Central Bucks County
    Posts
    65,885
    Quote Originally Posted by Michael Stafford
    By the way, alcohol or water based dye?
    Water based. Alcohol-based dyes really need to be sprayed to get even coverage as the alcohol flashes off so fast. Water based dyes can be "worked" with the rag to insure things look right. Once the WB dye dries, a quick hit with 320 wet and dry to de-fuz and a coat of de-waxed shellac to seal it makes it ready for further finishing. The shellac also gives transparency to the finish and the color choice of the shellac can add tone...which is why I use garnet shellac for this kind of project as it gives a little more red-amber to the brown color.

  14. #74
    Absolutely beautiful Jim! I love the way you are dying the wood on the dovetails. It's gonna look superb.

  15. #75
    Join Date
    May 2004
    Location
    N Illinois
    Posts
    4,602

    Jim

    Jim, Great job ,as always, with you! Your WW skills are evident, I love (echo) the look of your dovetails and the contrast! Great craftmanship! You're a role model for the rest of us...
    Jerry

Similar Threads

  1. Slow progress, but shop progress!!
    By Brad Hammond in forum General Woodworking and Power Tools
    Replies: 8
    Last Post: 09-23-2004, 7:08 AM
  2. Scrubs and smoothers and project progress
    By Tim Sproul in forum Neanderthal Haven
    Replies: 4
    Last Post: 08-21-2004, 2:07 AM
  3. Shaker Tall Cabinet Progress w/pics
    By Jason Tuinstra in forum General Woodworking and Power Tools
    Replies: 14
    Last Post: 05-16-2004, 4:46 PM
  4. W&H Molder progress
    By John Miliunas in forum General Woodworking and Power Tools
    Replies: 12
    Last Post: 01-26-2004, 9:56 PM
  5. Segmented Bowl in progress **LOTS OF PICS**
    By Ken Salisbury in forum General Woodworking and Power Tools
    Replies: 4
    Last Post: 07-04-2003, 7:06 AM

Posting Permissions

  • You may not post new threads
  • You may not post replies
  • You may not post attachments
  • You may not edit your posts
  •