


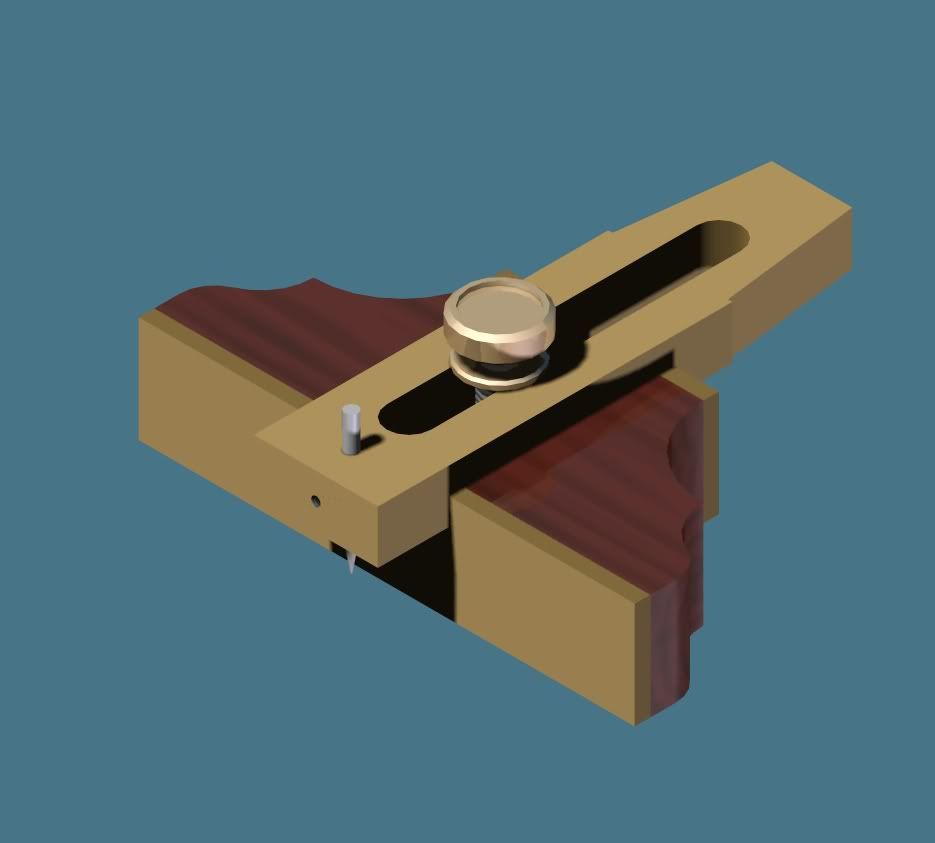
Over the past few weeks I've been discussing marking gauge design with Jack/Timberwolf and Hank Knight (both from WoodNet). After some initial design attempts, I decided that I liked Jack's design the best.
With some help from him I drew up the design in 3D and made a rendering.
I ended up modifying the design slightly to take advantage of the material I had on hand. But the basic design stayed pretty much the same as Jack's.
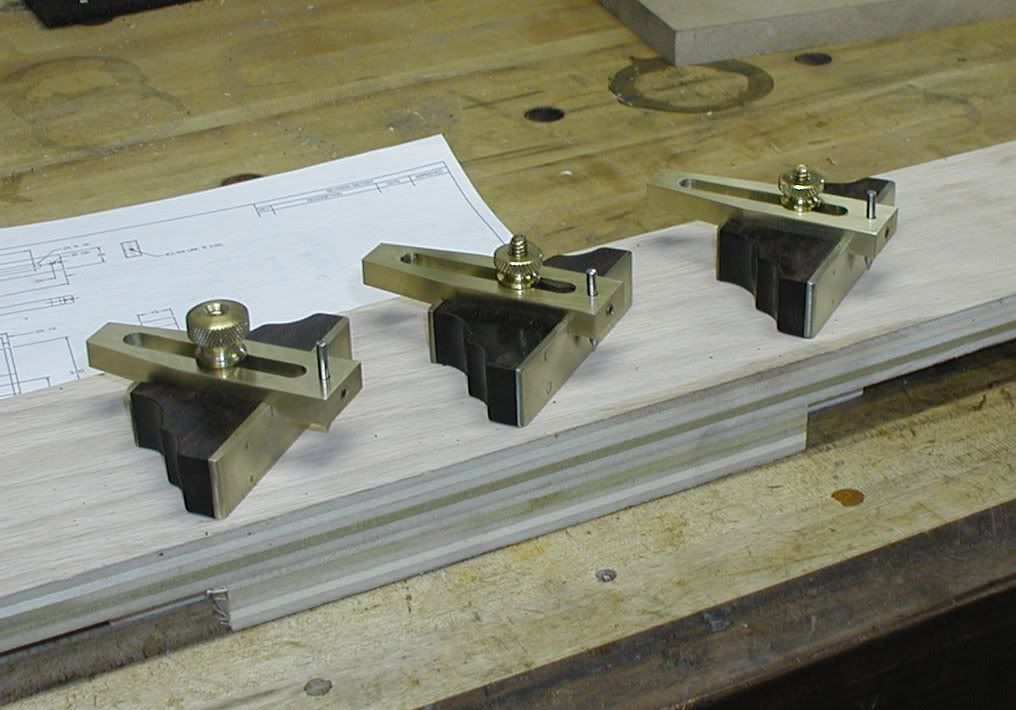
The body is coccobolo that was in my scrap bin and was slated to be turned into some marking knife handles. I was able to get enough for (3) marking gauge bodies. The brass came from the scrap bin at work (Yet another advantage to working in a production facility!). The "blade" is 1/8" dia HSS rod that I ground to a point.
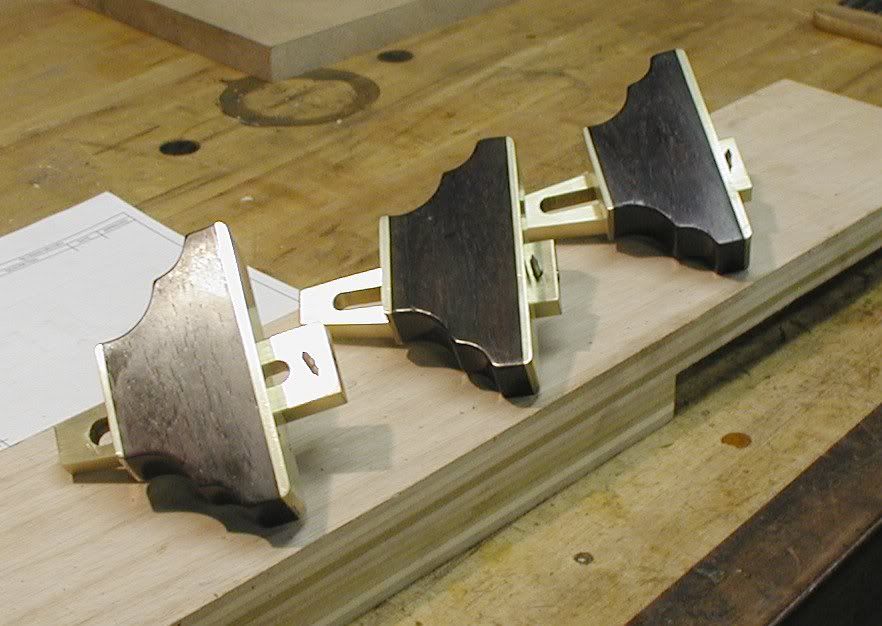
After the shape was cut out using (2) forstner bits and a slick little positioning jig, I epoxied the 1/8" thick brass to the front and back. Previous to this, the brass had the holes drilled for the attachment screw. After the epoxy cured, I drilled the holes in the wood for the brass screws, installed them just shy of the surface and then peened them over. After that I filed and sanded the faces flat. The next day I used the Bridgeport Milling Machine at work to mill out the 3/16" deep dado in the fence for the beam.
The beam was made from 0.950" wide x 3 1/2" long x 3/8" thick brass. I used the Bridgeport and a 5/16" end mill to cut the slot in the beam. To form the 7 deg angled sides of the dovetail "template" I used my specially designed jig at my disc sander. The holes were drilled for the blade and the 10-32 Allen set screw that holds it in place.
The 1/4"-20 knurled brass knobs were purchased from Woodpeckers. But the first one (and best looking) came from Jack.
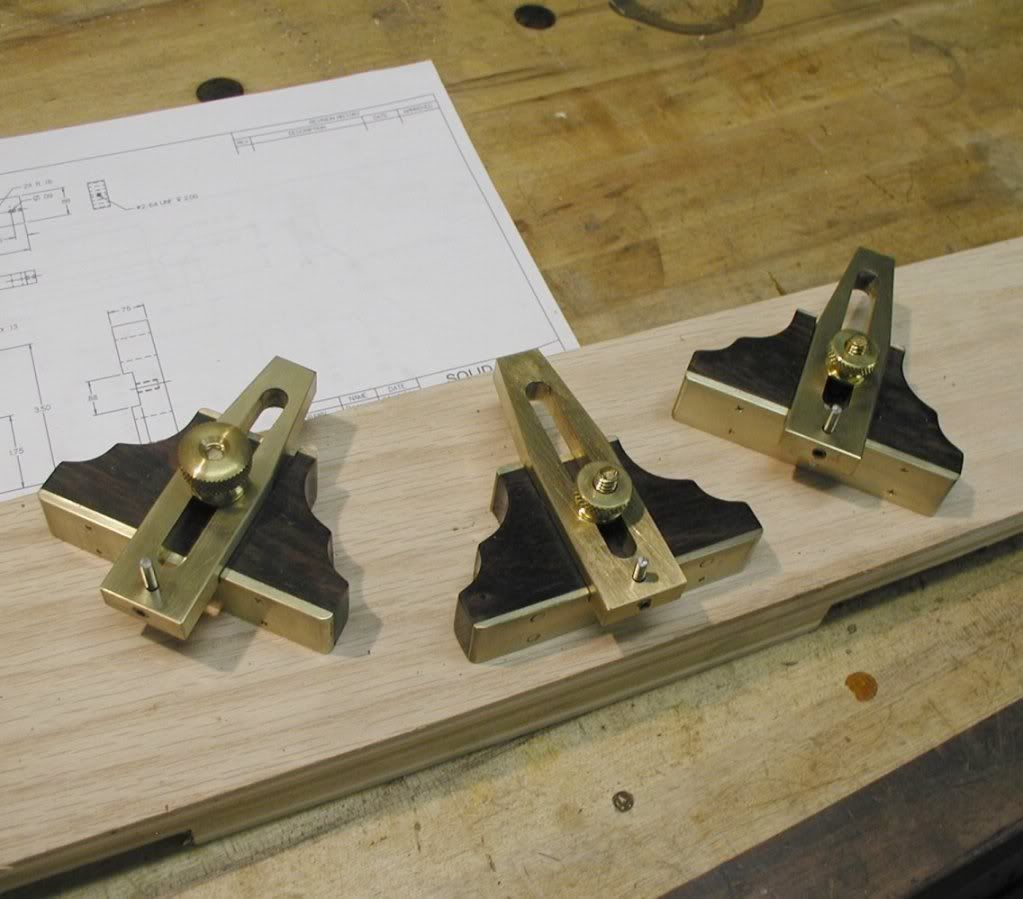
After the construction was completed, the brass was sanded and polished, the body got a coat of sealer, then several coats of shellac. I followed up with some buffing and a coat of wax.
All in all I'm somewhat satisfied with the way they turned out. However, I learned a lot about "infill" construction during this project and would do things quite differently the next time I undertake such a task.
1.) I'd drill the holes in the brass at slightly undersized for the tapered shaft of the screw. This way I could peen them over and not end up with the phillips head showing.
2.) I'd make the beam 4" or maybe 4 1/2" long and probably not bother with the dovetail template. I have a couple nice LV Dovetail templates that work just fine. And the added length of the beam would make the gauge more useful.
3.) I need another type of finish. I'm not sure if shellac is the right way to go. It was a pain to keep it off of the brass. Maybe french polish? I'm not sure.
I'll be bringing these to WIA with me today and tomorrow. I'd like to get some first hand feedback from those of you I may meet up with.

 Reply With Quote


