Results 1 to 9 of 9

Thread: Attaching a relief carving question

  1. #1
    Join Date
    Dec 2005
    Location
    San Anselmo, CA
    Posts
    323

    Attaching a relief carving question

    I am carving four shells (thx Mike Henderson for the tutorials!) that I need to glue to the aprons of a coffee table, as per below:

    9-7-09 002.jpg

    Thus, what is the best manner to apply these? With glue, my concern would be it could work itself undone with movement? So should I use hide glue should I ever need to re-attach it? I could also drill some small screws from behind.

    This question also brings up another question; traditionally, was relief carving seldom done as I have done it--in other words for my apron the cabinetmaker would have carved the shell directly onto the apron and then razed the rest of the apron to show it in relief? It would be alot of work to do it that way.

    Thx for your thoughts.

  2. #2
    There are two rules about applied carvings:

    1. Orient the grain of the carving in the same direction as the piece you're going to apply it to.

    2. Use a cut-off of the piece you're going to apply the carving to as the carving blank. The carving will better match the background wood and will look more like it's carved out of that wood and not applied. As the wood ages and changes color, the carving will continue to match the background wood.

    Anyway, if you match the grain direction, you can glue the carving with standard old yellow or white glue (or almost any glue) and it'll stay. It's when you cross grain the background wood and the carving that the carving won't stay attached.

    Nice looking carving - well done!

    Mike

    [Oh, your question about how it was done traditionally... Our ancestors were business people and had to be smart and efficient. Most of the time they did an applied carving as you've done. There's a few examples of carving done in the solid but not a lot.

    If the carving was carved INTO the wood, where the outside of the carving is lower than the plane of the wood, that is not applied but carved out of the board. When I refer to carving "in the solid" I mean a relief carving with all the background reduced to make a flat ground, with the carving standing proud. There's a couple of examples of Newport secretaries with the shells carved in the solid on the drop front - at least that's what I remember.]
    Last edited by Mike Henderson; 09-08-2009 at 12:44 AM.
    Go into the world and do well. But more importantly, go into the world and do good.

  3. #3
    Join Date
    Sep 2008
    Location
    Raleigh, NC
    Posts
    2,854
    A bit more info on the historical practice - of the pieces that I've seen in person, whether the carving was applied or raised from the solid has a good deal to do with the specific situation. In the case you're referring to, I've never seen a shell that was carved from the solid as an isolated element on the background.

    It's a bit different with the knees of cabriole legs - particularly on chairs, or acanthus leaf elements on piecrust or circular tea tables. These were usually carved from the solid.

    As to hide glue, it has a couple of advantages over good ole yellow glue. It's reversible, so if you make an alignment mistake it can be corrected by the application of heat and moisture (though in practice this isn't as easy as implied in books), and the glue itself will take a stain or dye, and is also dark, so little bits of glue squeeze-out don't have to be entirely removed.

    It also is not subject to "glue creep" as seen with PVA (yellow and white) glues, though in the case of an applied carving there is very little force to make that an issue.

  4. #4
    Join Date
    Dec 2005
    Location
    San Anselmo, CA
    Posts
    323
    So, in general, whenever I look at an antique piece of furniture with a relief carving I can assume that, more likely than not, it is an applied carving as opposed to a carving in the solid. This is good to know as almost all the antiques I see with relief carvings look as though they were carved in the solid.

    One follow-up question regerding the knees of cabriole legs - to carve and acanthus leaf element I would just leave an extra 1/2 of material at the top of the knee when bandsawing, do the carving, then just below the carving, I could bandsaw to the line? Doesn't sound that complicated.

  5. #5
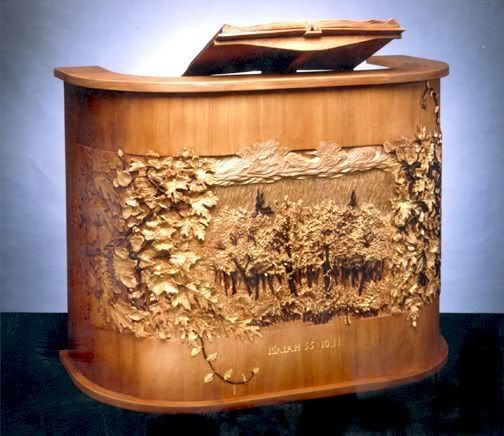
    heres an example of carving bold or up from the surface with no glue...one solid piece. the vine dangling down.


  6. #6
    Quote Originally Posted by Doug Mason View Post
    So, in general, whenever I look at an antique piece of furniture with a relief carving I can assume that, more likely than not, it is an applied carving as opposed to a carving in the solid. This is good to know as almost all the antiques I see with relief carvings look as though they were carved in the solid.

    One follow-up question regerding the knees of cabriole legs - to carve and acanthus leaf element I would just leave an extra 1/2 of material at the top of the knee when bandsawing, do the carving, then just below the carving, I could bandsaw to the line? Doesn't sound that complicated.
    I can only speak for myself but acanthus on cabriolet legs is very low relief. I guess it's because the knee sticks out that you don't have to do too much relief. I just make the knee area a small amount thicker and taper the background down while I'm doing the carving.

    Maybe someone else who carves them will say what they do.

    Mike
    Go into the world and do well. But more importantly, go into the world and do good.

  7. #7
    I haven't done one [yet] but I believe the way Phil Lowe teaches is that you don't leave any extra meat on the knee. You make the leg regular size and just carve and blend it below the knee. The knee carving is really low relief though, like 1/16" to 1/8" max. The way the carving flows makes it look a lot "thicker" than it really is.

  8. #8
    Quote Originally Posted by Robert Rozaieski View Post
    I haven't done one [yet] but I believe the way Phil Lowe teaches is that you don't leave any extra meat on the knee. You make the leg regular size and just carve and blend it below the knee. The knee carving is really low relief though, like 1/16" to 1/8" max. The way the carving flows makes it look a lot "thicker" than it really is.
    I saw a demo of acanthus leaf carving on a knee this past weekend at the Ohio River Valley section of the SAPFM. Your statement about the thickness is correct along with the carving on the drawers on Philadelphis highboys.

  9. #9
    Join Date
    Dec 2005
    Location
    San Anselmo, CA
    Posts
    323
    I am in the process of doing an acanthus leaf relief carving on the ball & claw feet I'm working on. I will post pics soon.

Posting Permissions

  • You may not post new threads
  • You may not post replies
  • You may not post attachments
  • You may not edit your posts
  •