Results 1 to 15 of 15

Thread: Two Shaker Candlestands

  1. #1

    Two Shaker Candlestands

    These are two Candlestands I made some time last year and never got around to posting them. I made them right after I got my new Jet lathe and I wanted something to tun on it and this seemed like a good project to try it out.
    One is in cherry and the other walnut. I made the Cherry one first and the wife just insisted the top was upside down and that the chamfer should be on the top so when I did the walnut one I did just that. I like them either way but the chamfer on the bottom is authentic to the original. The plan I used was from Uncle Norms first or second book, cant remember which.
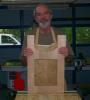
    They were too big for my current photo booth so in front of the big screen it was!!

    Comments and critiques welcome!!

    I just checked these pictures on my laptop and the color was great, the cherry was a nice rich color, looked good. Now Im looking at them on my desktop and the cherry looks horrible!! Orange even!! I hope it doesnt look like that to everyon else, hopefully its just my monitor!!
    Attached Images Attached Images
    Last edited by Jim Kountz; 03-29-2009 at 4:25 PM. Reason: Color?
    If at first you don't succeed, look in the trash for the instructions.


  2. #2
    Join Date
    Feb 2008
    Location
    Buffalo, NY
    Posts
    1,733
    Very nice Jim. Did you dovetail the legs into the center support?
    It’s only work if somebody makes you do it.
    A day can really slip by when you're deliberately avoiding what you're supposed to do.
    Duct tape is like the force. It has a light side, a dark side and it binds the universe together.

  3. #3
    Join Date
    Feb 2007
    Location
    Front Royal, Va.
    Posts
    1,480
    Well done Jim. I must side with you also as far as the chamfer goes. Looks more "normal" on the underside.

    Tony
    Tony

    "Soldier On"

  4. #4
    Quote Originally Posted by Brian Effinger View Post
    Very nice Jim. Did you dovetail the legs into the center support?
    Yes I did. I made a jig that fit between the ways on the lathe and just routed them in place after turning them. I first made a "flat" using a 3/4" bit, then hogged out most of the waste with a 3/8" straight bit then finally the dovetail slot. Worked pretty slick.
    If at first you don't succeed, look in the trash for the instructions.


  5. #5
    Join Date
    Feb 2008
    Location
    Stanwood, WA
    Posts
    3,059
    Only the first pic looks orange on my computer. These legs look familiar...Are these the same ones in your new tutorial?
    Dewey

    "Everything is better with Inlay or Marquetry!"


  6. #6
    Jim, those look great! I get a little orange on the cherry as well, but more on the top view. On the chamfer - definitely agree that it goes on the underside. On the walnut table, the grain match on the top turned out very nice.

  7. #7
    Join Date
    Mar 2003
    Location
    SE PA - Central Bucks County
    Posts
    65,923
    Beautiful work, Jim!! I love round candle stands like these...I've built two and will likely build more over time. Great project!
    --

    The most expensive tool is the one you buy "cheaply" and often...

  8. #8
    Join Date
    Oct 2006
    Location
    Harvey, Michigan
    Posts
    20,804
    Jim - very nice stands! They both turned out excellent! Walnut looks really good - but I love the cherry! Beautiful work! Thanks for sharing!
    Steve

    “You never know what you got til it's gone!”
    Please don’t let that happen!
    Become a financial Contributor today!

  9. #9
    Thanks everyone, I really appreciate the nice comments.

    Dewey: Those are close but the ones in my tutorial are actually from a Federal Tilt Top Table. The shaker legs are a little thinner and shaped slightly different but good eye on that!!

    Jim: I saw one you made and it is absolutely gorgeous!! I love the grain in yours, wish I had some of that lumber!!
    If at first you don't succeed, look in the trash for the instructions.


  10. #10
    Quote Originally Posted by Jim Becker View Post
    Beautiful work, Jim!! I love round candle stands like these...I've built two and will likely build more over time. Great project!
    Jim, what plans if any were you following when you built yours? I kinda like the legs on yours better, seem a little more shaker-ish if you know what I mean.
    If at first you don't succeed, look in the trash for the instructions.


  11. #11
    Quote Originally Posted by Dewey Torres View Post
    These legs look familiar...Are these the same ones in your new tutorial?
    Dewey the legs in my tutorial are from this:
    Attached Images Attached Images
    If at first you don't succeed, look in the trash for the instructions.


  12. #12
    Join Date
    Dec 2006
    Location
    Atlanta , Ga.
    Posts
    3,970
    Great job on the CS's Jim. I love the delicate legs and the cherry looks great for this piece.

    Sarge..

  13. #13
    Thanks John, I have a few more cherry planks from that same tree that Ive been saving for something special. Fantastic grain in those.
    If at first you don't succeed, look in the trash for the instructions.


  14. #14
    Join Date
    Jan 2004
    Location
    Lewiston, Idaho
    Posts
    28,565
    Jim...very nicely done! I've got some cherry acclimating in my shop. It is destined to be Norm's "Martha Washington candle stand" which is very close to that last one you posted.
    Ken

    So much to learn, so little time.....

  15. #15
    Ken thats another fine piece, I had forgotten all about it actually. Its the one with the "birdcage" right??
    If at first you don't succeed, look in the trash for the instructions.


Posting Permissions

  • You may not post new threads
  • You may not post replies
  • You may not post attachments
  • You may not edit your posts
  •