Page 2 of 2 FirstFirst 12
Results 16 to 24 of 24

Thread: Can't engrave picture

  1. #16
    Join Date
    Mar 2008
    Location
    Massachusetts, USA
    Posts
    463
    Quote Originally Posted by Frank Corker View Post
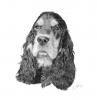
    I've just had a look at the picture. No way you'd ever be able to engrave that. It's awful for one thing (not the subject, she's fine) I would estimate that to be less than 72dpi at the very best. I'll pm my email address, send me the original picture.

    Just in addition to this - just re-read and saw this by George
    'The photo was converted to B&W and dithered using stucki (in corel photopaint)'

    just about explains everything!
    Thank you. I will send you a different, better picture. I picked that one as a starting point to see what I could engrave. Guess I picked wrong.

    Not sure what you are referring to by your last line above. If you mean corel photopaint does not do a good enough job at converting a photo for engraving, I am not adverse to buying photograv if that is what I need.

    Or do you mean that I used corel incorrectly with the conversion that I did, if so, what should I have done differently?

    Thanks
    George
    ______________________________
    ULS X-660 60 Watt
    Corel X4, Wacom Intuos 3, Photograv 3, Inkscape, CAMASTER 4x4 with 4th axis

  2. #17
    Join Date
    Oct 2005
    Location
    Moreton, Wirral, UK
    Posts
    3,287
    George, corel seems to return everything back to 72 dpi, generally messes things up a bit. We'll see what happens when you send the file.
    Epilog 45w Helix X3/X5 Corel Microflame Generator (flame polisher) Heat Bender


  3. #18
    Quote Originally Posted by Frank Corker View Post
    corel seems to return everything back to 72 dpi, generally messes things up a bit.
    Hi Frank,

    I am currently writing some software that uses graphic files so I am right at the pointy end of file header information.

    For an example, the first section of a .BMP file contains a File-Header, an Information Header and a Color Map then the main contents of the picture usually in compressed form. Two of those items in the Information Header are X-DPI and Y-DPI.

    If there is no X-DPI and no Y-DPI values in the Information Header then you are correct, Corel does assume 72-DPI. It seems fairly common to omit this information when files are saved by a lot of software (not Corel). Not sure why as I would have thought it is fairly critical.

    I have zipped 2 files.

    The first has no X-DPI and no Y-DPI and Corel at 100% size assigns 72 for both axis of this file.

    The second file looks identical at 100% size in Corel but it has 132 DPI for both X and Y. It looks identical because the DPI of your screen does not change with the file DPI.

    The difference comes with the actual size of the picture in the laser. If you do not change the DPI of the printing device, in our case the laser, the first will be burned 4.78" x 8.64" and the second, 2.61" x 4.71"

    Sooo, the culprit is the software that saved the original file and did not include X-DPI and Y-DPI information for Corel to correctly use. I do think Corel should warn there is no DPI information rather than just assigning 72 and not tell you. So, when you see 72 DPI in Corel, it might be prudent to assume the original had no DPI information.

    Confusing huh?
    Attached Files Attached Files
    Dave J
    Forums: Where all too often, logic is the first casualty.

  4. #19
    Join Date
    Oct 2005
    Location
    Moreton, Wirral, UK
    Posts
    3,287
    circuit board 1 is 72 dpi and circuit board 2 is 132 dpi
    Epilog 45w Helix X3/X5 Corel Microflame Generator (flame polisher) Heat Bender


  5. #20
    Quote Originally Posted by Frank Corker View Post
    circuit board 1 is 72 dpi and circuit board 2 is 132 dpi
    Hi Frank,

    If you are using Corel, it is putting the 72 in as the default because the header has a zero there. To my line of thinking Corel should NOT insert 72 there if the header is zero, or if it does, then it should tell you it has done so.

    2 JPGs attached. The info header is 0 for both the X and Y DPI settings in DPI_1.jpg. Note the biXPelsPerMeter and the biYPelsPerMeter are both zero in this file Circuit board 1.

    In circuit board 2 (DPI_2.jpg) the biXPelsPerMeter is set 5196 which equates to 132 DPI (5196 div 39.37(inches per Meter)) as is the biYPelsPerMeter.

    The point I am trying to make here is that IF the original software that created the picture from the camera had included the DPI into the .BMP header, Corel would not change it to 72. Corel only uses 72 when the header contains either 72 or zero. That's why it correctly shows the 132 DPI in the second circuit board file.

    If you now save circuit board 1 in Corel, it will erroneously (to my line of thinking) save the 72 into it replacing the original zeros. That's where the 72 you mentioned may mess up further working with the file as the original DPI might have been much greater.

    The way to find out the original DPI would be to find out the original camera picture size then adjust the DPI in Corel until the picture size matches the original. That will be the DPI to use for the picture.
    Attached Images Attached Images
    Dave J
    Forums: Where all too often, logic is the first casualty.

  6. #21
    Join Date
    Oct 2005
    Location
    Moreton, Wirral, UK
    Posts
    3,287
    Dave, thank you for the explanation (I actually see myself having to read it more than 22 times). My main concern is why? For a graphics package, aiming to be the ultimate in all graphics, make a fundamental error of such magnitude. Surely someone would have thought that the vast majority of people using it would be printing. Maybe this is why, in reputation only, they lag behind Photoshop (which I think is a highly overated and unecessarily complicated graphics package). I use it every now and then to achieve some of the filters, but other than that, it just sits there using half of my hard disk space!
    Epilog 45w Helix X3/X5 Corel Microflame Generator (flame polisher) Heat Bender


  7. #22
    Out there!!! no, no, do like I did and put it in the bedroom. I don't sleep well without a bed but the laser is nice and warm. I wanted to bring my shopbot in too but my brother said the floor wouldn't take the weight. So the shopbot is in the garage until my nephew finishes putting in two 3000 watt heaters close to it, or shall I say, close to me and the desk.

    Bill

  8. #23
    Quote Originally Posted by Frank Corker View Post
    My main concern is why? For a graphics package, aiming to be the ultimate in all graphics, make a fundamental error of such magnitude.
    Hi Frank,

    Easy answer for the first question, "beats me!" I guess it is a carry over from the original BMP specification (mid 80s maybe) where it always defaulted to 72 DPI which is the standard for black and white scans. That may well have been over-looked all this time.

    They probably assumed that all software always includes DPI but the carry over default was left there. The reason thy would have a default is for the real world measurement display. With a Zero in the byPelsPermeter that could produce the programmer's feared and dreaded Black Hole = Divide By Zero.

    To be fair to Corel, if the originating program had included the DPI then Corel will handle it correctly. However just plugging in 72 because that's what we have always done is NOT the right thing for Corel to do in my book. At the very least they should warn that's what they are doing.

    If Corel warned there was no DPI information you could attempt to arrive at the original with trial and error and here's how.

    As I mentioned previously, you would need the actual Width x Height of the pic in inches (mm is OK too). It has to be a real world measurement. Do NOT use Corel to tell you that. I will write a rough and dirty program to publish the Header info. Give me a day or so.

    Using Photopaint...

    1: Load in the pic and "Save As" Temp.bmp to preserve the original because you are going to need it later.

    2: Go to Resample and change DPI to a value of 100 and click OK.

    3: Close the Temp.bmp file in Corel and click OK to save the file.

    4: Load Temp.bmp

    5: Go to Resample and check the size in inches or mm. Do NOT use Pixels.

    6: Adjust the DPI again until you get close to or exactly the size from the original pic. When it is close enough for you, go to step 8.

    7: Go to step 3 and repeat as needed.

    8: Load the original and go to Resample. Reset the DPI to the one you have just discovered in step 6.

    9: Use "Save As" to save the file to a name you want to use and you should now have all the detail of the original preserved and the correct DPI.

    By the way, I am using v10 Corel so the above steps may not ALL be necessary in later versions but that's what I have to do to preserve the original file.

    We can start a new thread if you like.
    Dave J
    Forums: Where all too often, logic is the first casualty.

  9. #24
    As promised, please see my new post for FREE software...
    Dave J
    Forums: Where all too often, logic is the first casualty.

Posting Permissions

  • You may not post new threads
  • You may not post replies
  • You may not post attachments
  • You may not edit your posts
  •