| Making a Segmented
Bowl Written By: Ken Salisbury July 2003 |
|
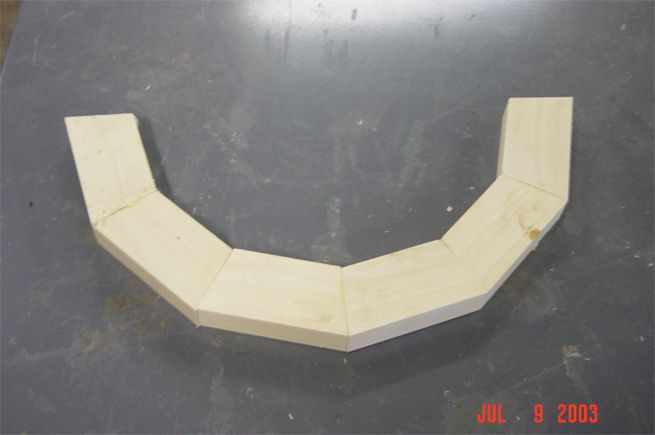
This article describes the process I used to make this bowl: Make a sketch of the desired bowl profile as shown in the drawing above. Plan out the number of rings desired and the thickness of each and lay those in the drawing as "A" thru "H" as above. Now you can determine the length and width of the segments in a given ring. There are software programs available to help you determine the length and number of the segments for a specific diameter. One such program can be downloaded here*. I use my own matrix which I developed some time ago to determine my segment configurations. I actually discovered Tony's article just a few days ago and plan on trying it on my next segmented bowl. The Process I cut segment pieces using a Delta CMS and vary the number of segments in a given ring. The number of segments in a given ring is a variable that needs consideration during the design of the bowl. (like they say in Alabama, ("whatever cranks your tractor"). Segments can also be cut using a table saw with a cut-off sled, adjustable for various angles required for the number of pieces in a given ring. It is absolutely essential to your success to be able to cut the segment pieces very accurately. This is necessary to eliminate gaps between segments and layers. This project is intended to be, at a minimum for intermediate woodworkers Novice woodworkers should start on a simpler layered bowl Apply Titebond II® glue to two (2) segment pieces and press together, hand holding for just a few seconds and set aside. (A flat surface is recommended to accomplish segment glue-ups). The rings must be flat so as to not produce gaps when they are assembled to complete the bowl blank. I use a metal lab table when accomplishing this task. This pretty much eliminates the requirement to run the rings through a drum sander to ensure they are flat prior to assembly although there are times when I find it necessary to do so. Next take pairs of segments and repeat the process until the ring is completed and a strap clamp can be applied until the glue is cured. This process continues until all the desired rings are assembled. Click Thumbnails for full size views
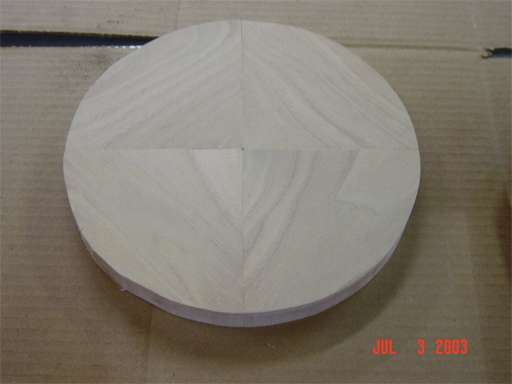
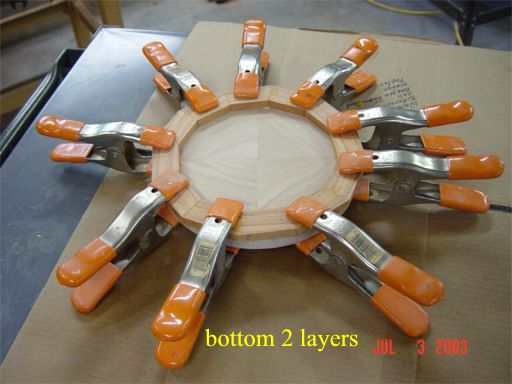
Next comes the assembly of the rings to form a completed bowl blank, ready for turning. I prefer to assemble the rings in pairs using plenty of clamps to eliminate any gaps—again using Titebond II glue. Set these pairs of rings aside to dry. Although only an hour is required, I usually allow them to cure overnight. After assembling the bottom 4 rings I rough turned them on the lathe between centers.
The next step is to assemble the groups of rings sequentially to make the completed blank -- again, lots of clamps are a necessity.
The top layer of the blank is a scrap piece of pine which was used to mount the completed blank to a 6" faceplate. The blank was installed on my lathe (Jet 1236) and the outside bowl profile was turned. It should be noted that during most of this turning process the lathe tail stock was used for stability (moved back to take pictures for clarity purposes).
I sanded the outside with progressive grits of 100, 150, 220, 340, 600 and then burnished with shavings, It
should be noted at this point—after turning the outside I
didn't like the effect of the 4 segment ring of butternut for the bottom
of the bowl. However, I did want the effect of the design to be
seen on the inside. So with the blank still in the lathe I cut a
disc of black figured walnut, glued and clamp to the bottom of the blank
while it was still mounted in the lathe (using 3 Bessey clamps) bringing
up the tailstock to center the piece to the blank and let sit overnight.
I turned a recess in the walnut bottom to accept a Nova Chuck and then reversed the blank on the lathe mounting with a Mini Nova chuck. I then turned off the scrap pine which was use to mount the blank to the faceplate and started the process of turning the inside of the piece..
After completion of the inside turning process I sanded the inside using the same progressive grits as on the outside. I then applied a liberal coat of Minwax Antique Oil to the entire surface. After a 10 minute wait I buffed the entire blank with a soft cloth and allowed the oil to cure overnight. I repeated this process 3 times. I then applied a coat of Minwax Finishing Wax, buffing with a soft cloth after 10 minutes. I waited about an hour and applied a second coat of wax and buffed. After removing the bowl from the lathe, I drilled a 1 ¼" recess in the bottom using a forstner bit to accept a custom signature wooden medallion. The finished product
Types of wood used in each ring:
Copyright ©2003 Ken Salisbury of Ken's Wood Central. All rights reserved.
|