That photo posted upside down. Who knows what is wrong with this forum software...


That photo posted upside down. Who knows what is wrong with this forum software...
 Contributor
If you feel you need to bricklay and pattern-rout stacked layers in order to get an accurate curve I suggest keeping the thickness down and use 3 or 4 layers as trimming with a long router bit invites chatter. Saw as close to the line as possible. You may get some router tearout near the joints due to grain direction reversal and you will have a busy looking assembly. For exterior use reinforcing the endgrain joints with dominos and epoxy is a good idea.
Bricklaying will give a somewhat stronger result than full height segments. Veneering over the bricklaid assembly will strengthen the back further. You will have to decide if the extra work is worth it. The original makers kept it simple and I would do the same, segmenting the curve in full height pieces with splined and epoxied joints, then sawing and sanding.
The strip laminated approach can work, you need thicker cauls and more clamping force.
And more clamps.Originally Posted by Kevin Jenness

Contributor
Not necessarily. Pneumatic pressure is an option (Fine Woodworking #63 p. 83, Pneumatic Lamination). If one runs short of clamps threaded rod is an alternative as shown here. https://woodarchivist.com/3725-makin...nation-curves/ In any event the project needs enough force distributed evenly through cauls to pull the laminates together gap-free.
 [OP]
Contributor
[OP]
Contributor
I think I would have done far better with air dried white oak, but couldn't get it from my local supplier. That led me down a path that despite tremendous effort, just won't work for me. It's going to be solid wood.
I understand that the joints will be miters. I wrote that badly. If I have to veneer over the outside of the pieces to make it look better, I certainly can do that. Might have to buy a slightly larger vacuum bag, but really don't know if I'll need to go that route.
That's an interesting insight, Kevin, regarding long router bit chatter. I do have a good bandsaw, and a good Hammer oscillating edge sander, so I should be able to sand things reasonably well after gluing, although have to make an extension of sorts to keep the curved piece level when sanding. Sanding the inside of the curve might be a little more challenging.
- After I ask a stranger if I can pet their dog and they say yes, I like to respond, "I'll keep that in mind" and walk off
- It's above my pay grade. Mongo only pawn in game of life.

 Contributor
Green wood bends the best. For my "tree to finished product" projects I have done the bending with wood that is not even air dried.
Kiln dried lumber is not an issue with bent lamination. You need 1) laminates that are thin enough to be able to bend around your form, 2) an appropriate glue that has a hard glue line (and likely sufficient working time), and 3) sufficient pressure distributed over the laminates to bend the laminates gap free around your form. I've constructed a number of chairs using both steam bending and bent lamination techniques with kiln dried wood.
I gather that you also tried steam bending. A few questions about that:
1. Did you soak the wood? When I bent 10/4 kiln dried cherry, I soaked the blanks for 7 days before steam bending them.
2. Did you wrap the blanks in plastic when you steamed them? This is a technique I learned from Michael Fortune. Wrapping the blanks in plastic helps to retain moisture in the blank as you steam it and increases heat transfer to the blank.
3. How long did you steam the blanks? I'm at 5400 feet so I can't get my steam box above 197 degrees. As a result, I steamed the 10/4 blanks for 4 hours to ensure that they were very well heated. I've also bent 9/4 kiln dried walnut at 8200 feet -- sufficient time soaking to raise the moisture content of the blank and sufficient time in the box to heat the lignon is needed to be successful in bending.
4. Did you use a strong compression strap? Steamed wood will compress considerably, but if a compression strap doesn't tightly hold the inside of the stock, the blank can separate or crack. The Veritas compression strap and fixtures (from Lee Valley) are very good--they were designed by Michael Fortune, and come with a guide to steam bending that was written by him.
5. Did you put your bent parts on a drying form? Once bent, the part needs to be clamped to a drying form to dry. It takes 1 to two weeks for the part to return to equilibrium moisture if it has been properly steamed. Removing the part from the drying form generally leads to a minimum of excess springback or, for that matter, the part looking nothing like the form.
Mike
[OP]
Contributor
So I've taken apart my bending jig and will now work on much smaller pieces that will be glued together. Your advice has been great, and very appreciated, Mike (and others), but this just didn't work in my hands, despite more than the college try (and significant expense and wasting of wood). Oh well. How we learn, sometimes the hard way.
- After I ask a stranger if I can pet their dog and they say yes, I like to respond, "I'll keep that in mind" and walk off
- It's above my pay grade. Mongo only pawn in game of life.
Contributor
A clever thing that banjo builders do is to use iron brake drums for forms. I have a wheel from a line shaft pillow block that I have bent around. It is too small for those chairs but it is an excellent form.
IMG_2013.jpg
Last edited by Maurice Mcmurry; 05-09-2024 at 7:57 AM. Reason: Steel form image
[OP]
Contributor
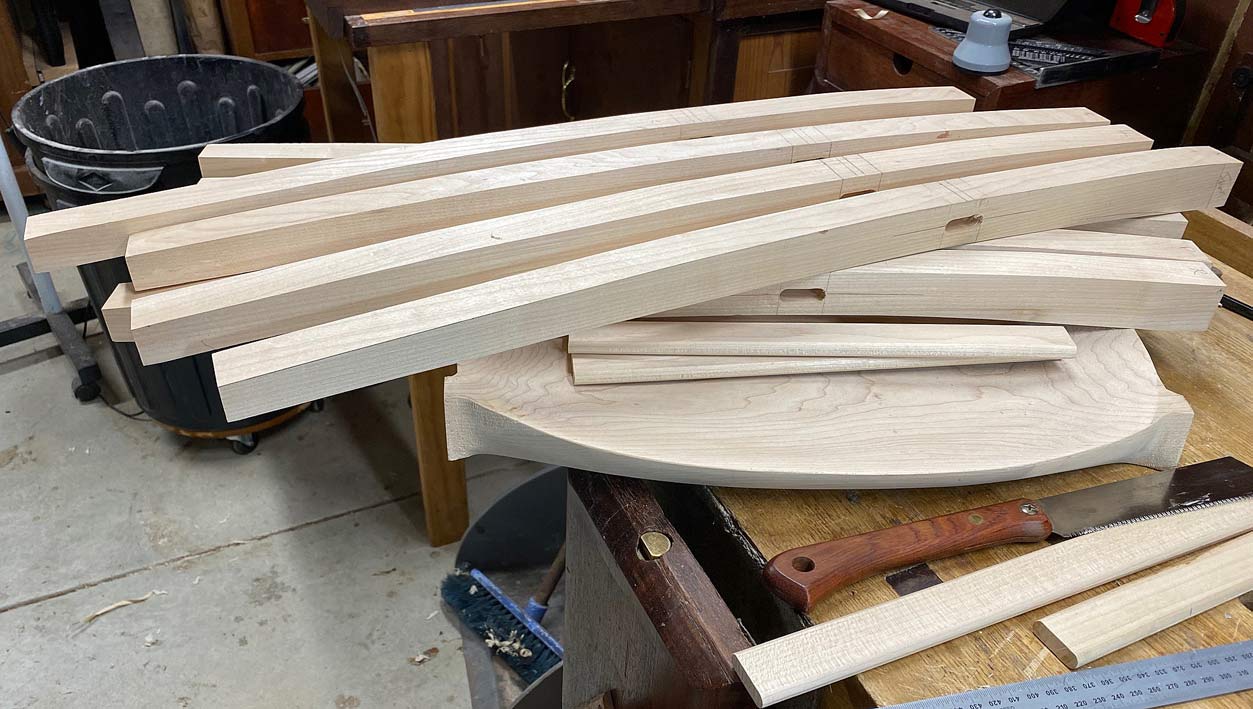
So working on a different approach. I cut out some 1-7/8" thick, 6" or so wide white oak blanks, long and wide enough for half of the bend of the chair back. My thought was to make quarter circle pieces, glue them together (with dominos or dowels for reinforcement along their long axis, and then attach the long end pieces, which would be easy.
So I made a pattern out of 1/4" MDF, traced out the pattern on the first blank and cut pretty close to the line on my bandsaw. The only pattern router bit that I had that was long enough was a 2 flute, 1/2" shaft, straight bit with 2" cutter length.
Here's what the oak looked like before routing with the pattern on top (just placed there in the picture, not 2-sided taped down yet:
Chair Back Piece with Pattern 1.jpg
Well, besides this being a little scary on the router table, I got a significant amount of tearout in a few locations. I'm tempted to buy a spiral upcut router bit to do this, but will this eliminate the tearout, considering that I am going around the grain during the cut?
- After I ask a stranger if I can pet their dog and they say yes, I like to respond, "I'll keep that in mind" and walk off
- It's above my pay grade. Mongo only pawn in game of life.
 Contributor
Alan, the key to avoiding tearout is a light cut. Several light cuts are better than one deep cut.
Joining the pieces is easier with dowels using centre finders ...
Getting there (lots more shaping still needed) ...
Regards from Perth
Derek
[OP]
Contributor
Thanks for the advice, Derek. The dowel option looks like a great way of doing it.
How do you do light passes with a pattern / flush trim bit? I sawed as close as I could to the line without going too far in with the bandsaw. Once that is done, aren't the passes with the router bit kind of fixed?
Clearly you've accomplished the task I'm looking to do. How did you make those curved back pieces?
Last edited by Alan Lightstone; Yesterday at 9:18 AM.
- After I ask a stranger if I can pet their dog and they say yes, I like to respond, "I'll keep that in mind" and walk off
- It's above my pay grade. Mongo only pawn in game of life.
Contributor
Alan, my apology - I was describing two separate strategies for two separate tasks, and they would have appeared to you to be the same.
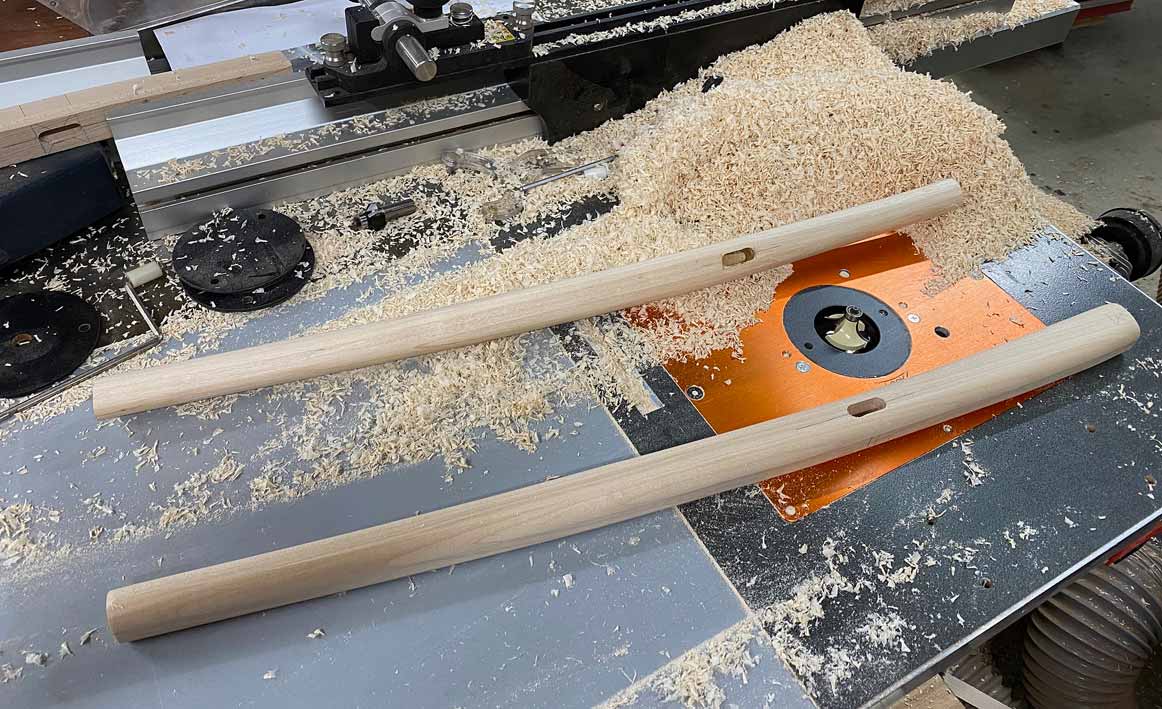
Firstly, the legs were marked out with a template I created, and then bandsawed out. The first time I tried this, there was about 2-3mm waste, and the result was Tear Out (scary stuff!). It had been a while since I had worked Hard Maple, and forgot how fragile it can be. Following this, I bandsawed to 1mm, and then decided it would be easier to just use a spokeshave, which I did.
The legs are oval, and the process was started on the router table with a large half-round bit. Rather than attempt to take it off all at once, this was done progressively. In other words, a few fine cuts ..
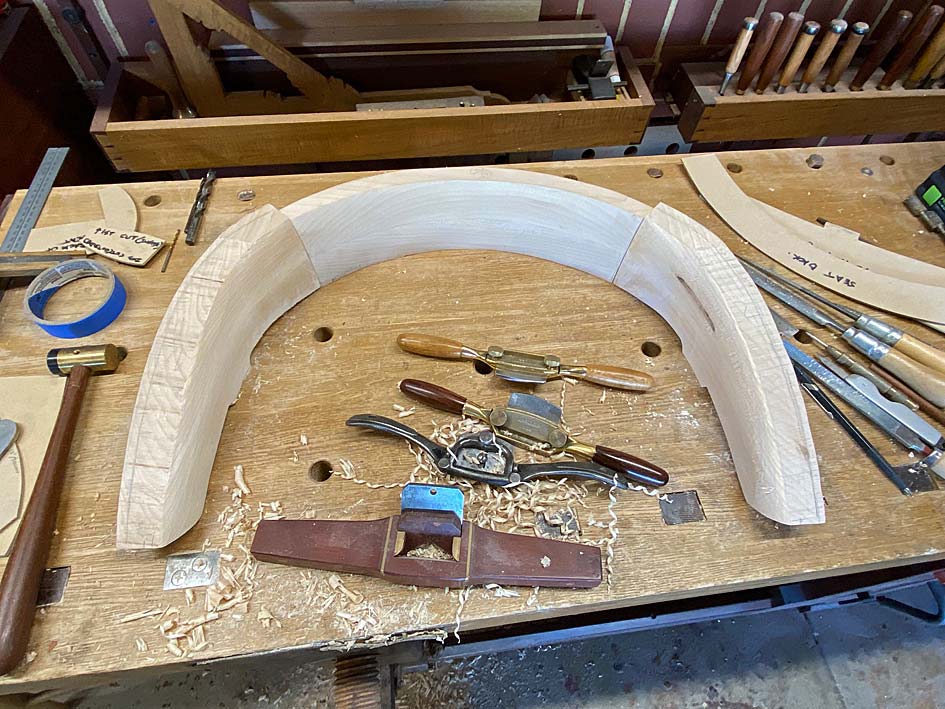
Now the part that applies to you is this - building the arms.
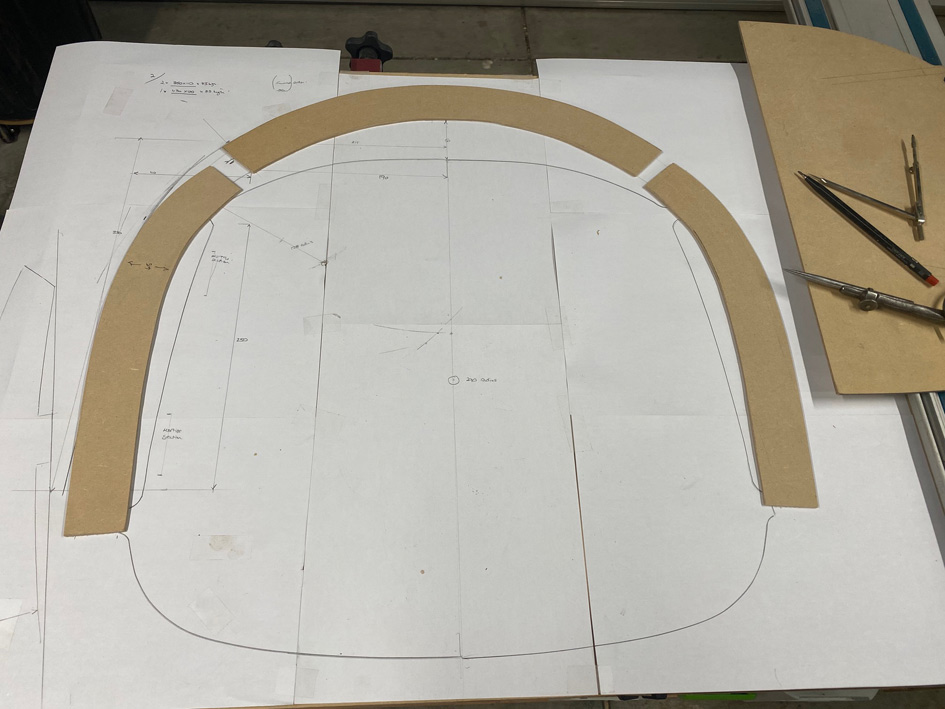
Templates for three sections.
Fitting three sections. They are blocky at this stage:
This is probably what you are looking for:
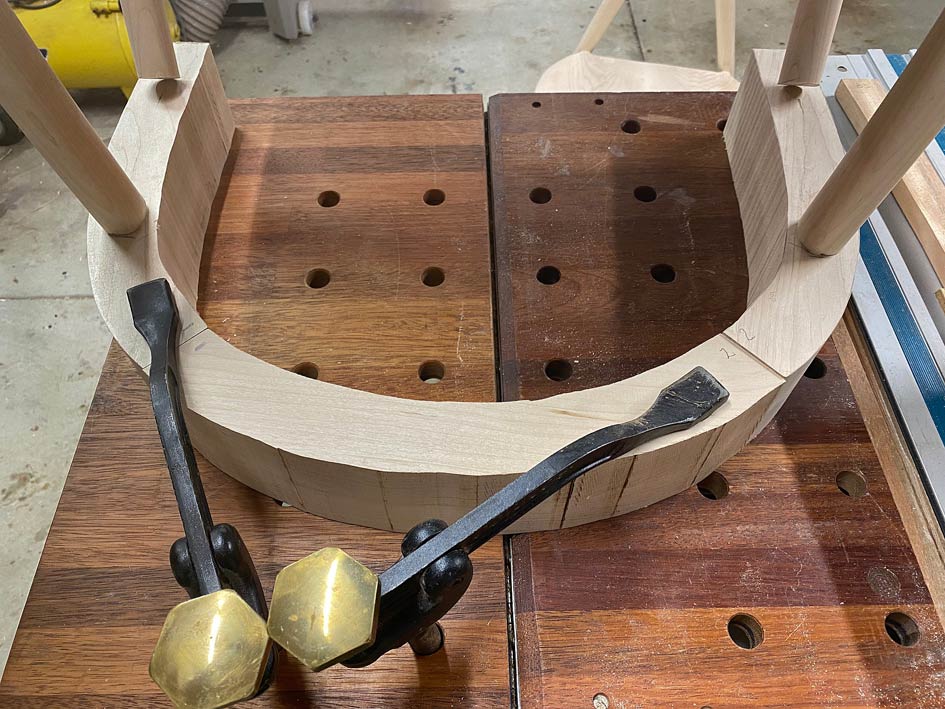
After joining the sections with dowels and epoxy, you can clean up with a sander. I am using spokeshaves ..
The reason for the (3/8") dowels was that, using pointers, they are easier to position on a curve than a domino. All I needed was a block of wood as a guide to drill square ...
Hope this helps.
Regards from Perth
Derek
Contributor
If you are running a quarter circle blank along the curve in one direction some tearout is almost almost guaranteed. Find a way to cut with the grain, either flipping the blank end for end in the jig, using a box jig with templates top and bottom or using a trimming bit with both top and bottom bearings.
Going back to your post #36, the semicircles shown in your model are segmented in 4 pieces. This is stronger, with less grain runout and waste, than a 2 segment assembly. I don't know if you could get out those full height segments from 8/4 material though. With your stacked approach you can increase strength by vertically offsetting the joints in your "bricks". More segments decreases the risk of tearout when routing against the grain.
Your jig is scary. At the least, add some handles to keep your fingers away from the cutter. Even safer would be to have separate, more substantial jigs for the inside and outside curves. Also, the jig should be longer than the blank so you can start feeding it against the pilot bearing before the cutter engages the blank. There's a reason why some old school shaper hands were known as "Stubby".
Last edited by Kevin Jenness; Yesterday at 9:21 AM.
[OP]
Contributor
I agree about the scary part. I won't be doing that again. I agree about inside and outside curve jigs. But even using a 1/4" plywood or MDF jig with the wood piece clamped to it would exceed the cutter length on my router bit.
I was hoping to have less joints, so was trying for the curved portion to be segmented in 2 pieces. Might not be the best approach. I would think with a total height of 5-1/2" - 5-3/4" for the chair back (3 individual pieces glued together vertically) it would be plenty strong.
Last edited by Alan Lightstone; Yesterday at 9:17 AM.
- After I ask a stranger if I can pet their dog and they say yes, I like to respond, "I'll keep that in mind" and walk off
- It's above my pay grade. Mongo only pawn in game of life.
 Posting Permissions

 Reply With Quote