Page 1 of 2 12 LastLast
Results 1 to 15 of 21

Thread: Resawn Leftovers, clean and trimmed

  1. #1
    Join Date
    Jun 2010
    Location
    twomiles from the "peak of Ohio
    Posts
    12,193

    Resawn Leftovers, clean and trimmed

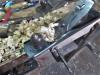
    Saw was a bit busy the other night...
    Resaw Clean-up, Trimmings.JPG
    Trimming bad ends, bad edges....trying to get a decent supply of blanks for use..
    Resaw Clean-up, Long Blanks, Trimmed.JPG
    About a dozen or so of these long blanks...letting them get used to their new size...and..
    Resaw Clean-up, Short Blanks, trimmed.JPG
    A stack of shorter blanks....may go back and glue a few panels up from each stack? Have to mind how the grain matches up..
    Resaw Clean-up, Live edge, maybe.JPG
    Not sure what I'll use this live edge blank for...yet..

    Book matching?
    Resaw Clean-up, Book-matching.JPG
    Whether to glue up into a panel? Make a set of Doors/Lids/Drawer fronts? Maybe 4 drawer fronts, and keep these matched up? Maybe a small 4 drawer cabinet? Glue 3 blanks up into the sides and a top, rest for drawer sides and backs....Not sure about a base, yet... We'll see....

    Stay tuned..
    Last edited by steven c newman; 12-11-2023 at 1:45 PM.
    A Planer? I'm the Planer, and this is what I use

  2. #2
    Join Date
    Jun 2010
    Location
    twomiles from the "peak of Ohio
    Posts
    12,193
    Tuesday's Panel Works...
    Tuesday Panel Works, panel 1.JPG
    Start point, Panel #1 and..
    Tuesday Panel Works, panel 2.JPG
    Panel #2....need to get rid of the Gaposis....we have ways..
    Tuesday Panel Works, edge jointing.JPG
    Stanley Jumbo Jack to joint the edges...then
    Tuesday Panel Works, gap fighters.JPG
    These 2 to "refine the fit...
    Tuesday Panel Works, looking for gaps #2.JPG
    Checking fro gaps...just sitting there, no clamps, nor glue involved...until..
    Tuesday Panel Works, Panel 1 glued up.JPG
    Glue, clamps, and Cauls become involved...
    Tuesday Panel Works, enough clamps.JPG
    Both panels are now IN the clamps..letting them sit a day or 3...
    Planes involved, today?
    Tuesday Panel Works, planes used today.JPG
    Stanley No. 60-1/2...Stanley No. 4-1/2c, Type 11....and Stanley No. 5-1/2c, Type 11......

    Stay tuned..
    A Planer? I'm the Planer, and this is what I use

  3. #3
    Join Date
    Jun 2010
    Location
    twomiles from the "peak of Ohio
    Posts
    12,193
    The Single Brain Cell Sketch Up has come up with a plan for these resawn parts...

    Panel #1: square both ends, then saw into 2 equal panels...to be the "Sides" of a case
    Panel #2: Square one end. then cut for length to form the bottom panel of a case
    Figured Panel: With the split, continue along to make an "upper" and a "Lower" drawer front...
    Figured Panel: Without the split....trimmed to make the top of the case.
    Case Joinery: will either be through dovetails, OR...1/4" x 1/4" finger joints....

    Floors of the drawers to have Green Felt applied...have not decided on any dividers in the drawers..yet..

    Divider between the 2 drawers: 1/4" plywood, set in 1/8" deep dados. Faced with a strip ripped from the fancy panels during clean up
    Resaw Clean-up, Trimmings.JPG
    Likely one of those 1/4" x 1/4" strips.

    Drawer boxes to be made from the Shorter slats...with a 1/4" plywood bottom....

    base has not been decide upon, yet...wait and see...

    Schedule for the Finish? Requested a DARK Walnut stain...

    Completion Date: 25 December 2023...I hope..

    Stay tuned...
    A Planer? I'm the Planer, and this is what I use

  4. #4
    Join Date
    Jun 2010
    Location
    twomiles from the "peak of Ohio
    Posts
    12,193
    Ok...
    Resaw Wednesday, drawer fronts.JPG
    Now have blanks for 2 drawer fronts..., next..
    Resaw Wednesday, parts is parts.JPG
    Parts is parts....

    Had to rip the bottom panel for width...taking just a bit of each edge...then flatten what is left..
    Resaw Wednesday, Bottom panel.JPG
    This will become the bottom of the case...and the bottom drawer is to slide in and out on it....so it has to be smooth and flat.
    Then the sides will join it on the ends...and should keep it flat..
    Resaw Wednesday, Bottom and a side.JPG
    Before I can glue things up...I need a dado....in both of the sides...to support a 1/4" plywood panel, for the upper drawer to slide on. Will also add a rebate around in back, all the way around, to house another 1/4" plywood panel for the back....at least THAT is the plan, right now..
    Resaw Dovetail work, Drawer Fronts, divider.JPG
    There will also be a hardwood strip added to the front of the plywood panel...

    Stay tuned...Corner Joinery? Through Dovetails, this time around...
    A Planer? I'm the Planer, and this is what I use

  5. #5
    Join Date
    Jun 2010
    Location
    twomiles from the "peak of Ohio
    Posts
    12,193
    Joinery...note to self: NEVER get in a hurry, ever.
    Poplar Box Project, sitting down on the job.JPG
    Just sit down, take it slow....relax....other wise..bad things happen...so..

    Corner #1:

    Lay outs..
    Resaw Dovetail work, bevel gauge.JPG
    Bevel gauge..combo square?
    Resaw Dovetail work, depth setting.JPG
    Setting the depth, and marking cut lines...I also used a marking gauge set as small as it can go..1/4"
    Resaw Dovetail work, No. 68 saw.JPG
    Disston No. 68 is next....I was trying to split the lines,,or at least cut on the waste side..
    Resaw Dovetail work, Saw cuts.JPG
    Then up on the chopping block..
    Resaw Dovetail work, Knife a line.JPG
    Deepen the gauge lines with a knife, and a square...and do a wee bot of chopping..
    Resaw Dovetail work, chopped.JPG
    I guess you would call these the Pins? I then traced around these,,,to mark out the "Tails"...saw them over on the bandsaw...and try a dry fit...
    Resaw Dovetail work, dry fit #2.JPG
    Not too hateful?


    Ok...got flushed with success, and went to do #2 corner....bad idea, was NOT double checking things...like which way the pins were supposed to face...grrrrr, sawed the offending pins off..tried again..yep...was getting a bit warm under the collar...and did the bass-ackwards routine again..and removed THOSE Pins as well....then just set everything aside..swept the floor, and headed back upstairs...to cool off...

    Was informed I had Laundry Detail..TODAY! Stay tuned...as I stayed down there while waiting on the washer..
    A Planer? I'm the Planer, and this is what I use

  6. #6
    Join Date
    Jan 2019
    Location
    Fairbanks AK
    Posts
    1,566
    I noticed you used a 4 1/2 up above a little ways. I personally find my 4 1/2 is either too wide or not long enough for most things I try.

    What is the 4 1/2 best at?

    I think my left shoulder isn't quite as far gone as your one knee, but I am not far behind you.

  7. #7
    Join Date
    Jun 2010
    Location
    twomiles from the "peak of Ohio
    Posts
    12,193
    Ok...hauled the Hamper to the shop/Laundry Room.....and set about doing corner #2..the RIGHT way...
    Resaw Dovetail work, lay outs.JPG
    I used the side to lay out the cut lines...making sure the side was facing the correct direction...then the saw, and chisels set to work...

    Already had Dry fit #1..
    Resaw Dovetail work, Corner #1 done.JPG
    And soon, slowly...had a dry fit of corner #2..
    Resaw Dovetail work, Corner #2 done.JPG


    Will look like this from the top of the case..
    Resaw Dovetail work, top view.JPG

    I also sat that case right by the vise...to make sure Corner #3 would be in the correct direction..triple checked, too...
    Resaw Dovetail work, Corner #3.JPG
    Corner #3....already sawn...awaiting chisel work...TOMORROW. Area between the shoulder blades is too sore, right now...toes were trying to cramp up....and a couple fingers as well..

    Stay tuned...with any luck, I can have all 4 corners done, tomorrow...and move onto Dados & Rebates.....and then figure out the building of 2 drawers..
    A Planer? I'm the Planer, and this is what I use

  8. #8
    Join Date
    Jun 2010
    Location
    twomiles from the "peak of Ohio
    Posts
    12,193
    Right now...the 4-1/2 is SHARP...and easier to keep level the the 5-1/2 I was jointing with...MIGHT be a tad too big for this project as a smoother....may try out either a #4 or even a #3c, we'll see....

    Uncle Arthur (itis) likes my knee, hands, and neck....40+ years on forklifts, tend to beat people up....so does working with Concrete...
    A Planer? I'm the Planer, and this is what I use

  9. #9
    Join Date
    Jun 2010
    Location
    twomiles from the "peak of Ohio
    Posts
    12,193
    Today WAS a bit better....until I broke the bandsaw blade...on the next to last cut..finished up with the No.68 Disston, and a file...
    Corner #3..
    Resaw works, Friday, Corner #3 dry fit.JPG
    Dry fit, off the saw, BTW...needed a helper to fit things together..
    Resaw works, Friday, helping hand.JPG

    Then, Corner #4..
    Resaw works, Friday, Corner #4 dry fit.JPG
    I might just get the hang of doing these...someday?


    Next up? 2 dados, and a rebate for a back panel....then start on the 2 drawers..
    Stay tuned..
    A Planer? I'm the Planer, and this is what I use

  10. #10
    Join Date
    Jun 2010
    Location
    twomiles from the "peak of Ohio
    Posts
    12,193
    Rebates to house a back...
    Resaws, dados & rebates, rebates done.JPG
    Done....Dados to house a drawer divider..
    Resaws, Dados & rebates, dados done.JPG
    Done did....Panel for the back of the case..
    Resaws, dados & rebates, back is fitted.JPG
    Sawn and fitted...panel for the upper drawer to slide on..
    Resaw, dados & rebates, plywood drawer shelf fitted.JPG
    Sawn and fitted. Then add a strip of Ash..
    Resaws, dados & rebates, face frame fitted.JPG

    So that..maybe..tomorrow....I can glue up this case? THEN I can start on the drawers?

    Stay tuned..
    A Planer? I'm the Planer, and this is what I use

  11. #11
    Join Date
    Jun 2010
    Location
    twomiles from the "peak of Ohio
    Posts
    12,193
    Glue-ups happen, I guess..
    Resaws, The Glue-up, almost enough clamps.JPG
    Cauls, clamps and glue.....letting this mess sit a spell...still need to trim and glue on the back of the case...maybe tomorrow,eh?
    A Planer? I'm the Planer, and this is what I use

  12. #12
    Join Date
    Jun 2010
    Location
    twomiles from the "peak of Ohio
    Posts
    12,193
    Had to cut a spacer, as the plywood drawer divider had bowed a bit...square the case up...trimmed the back to size..spread some glue to wherever the back will touch...and clamped it in place.

    Based on all the fighting to do just that, this morning...I think I'll wait a day, BEFORE trying to build the 2 drawers....that "Monday Thing"?

    Stay tuned..
    Photos?
    Resaw Monday, spacer bar needed.JPG
    Spacer bar..to keep the divider straight, until the glue sets up..
    Resaw Monday, bottom glued up.JPG
    Glue and clamps...let this sit a day?
    Corners of the case have been cleaned up..
    Resaw Monday, cleaned corner.JPG
    Not too hateful?
    Last edited by steven c newman; 12-18-2023 at 2:52 PM.
    A Planer? I'm the Planer, and this is what I use

  13. #13
    Join Date
    Jun 2010
    Location
    twomiles from the "peak of Ohio
    Posts
    12,193
    Took the clamps off just now. Bad case of Vertigo going on, not safe to be around a shop full of sharp objects, almost need a seat belt for my Computer Chair....

    Test fit of the Drawer Fronts...top one is a tad too tight...bottom one is just about a perfect fit.

    Tomorrow being PayDay for me...it will be rather late before I can return to the shop....
    A Planer? I'm the Planer, and this is what I use

  14. #14
    Join Date
    Jun 2010
    Location
    twomiles from the "peak of Ohio
    Posts
    12,193
    Will give a try, today...Vertigo seems to have let up a bit, we'll see...Drawer Building 101?
    A Planer? I'm the Planer, and this is what I use

  15. #15
    Join Date
    Jun 2010
    Location
    twomiles from the "peak of Ohio
    Posts
    12,193
    Top drawer is done.
    Front corners are through dovetails...with the tails showing...back is attached to a rebate at the end of the sides...Bottom was cut to fit...and the entire mess was glued up..
    Resaw, Drawers, Top Drawer glue-up.JPG
    Clamps came off after a day..fine tune the fit..
    Resaw Thursday, it wokrs.JPG
    Slides easy enough..
    Resaw Thursday, Test fit top drawer.JPG
    Closes up flush with the front of the case...knobs?
    Resaw Thursday, needed a dowel.JPG
    They use a dowel to attach with...was not about to drive to Wall E world, just to buy ONE 1/4" dowel...when I can make one..
    Resaw Thursday, To fit into the knob.JPG
    Mark how much I need to attach to the drawer front..
    Resaw Thursday, dowels fitted.JPG
    A dab of glue, drive the "dowel" home, let these sit a spell..

    Resaw Thursday, Quitting Time!.JPG
    Some where out of the way, perhaps...

    Bottom drawer was next...usual suspects as to tool kit..
    Resaw Thursday, today's tool kit.JPG
    Stay tuned....
    A Planer? I'm the Planer, and this is what I use

Posting Permissions

  • You may not post new threads
  • You may not post replies
  • You may not post attachments
  • You may not edit your posts
  •