Page 1 of 2 12 LastLast
Results 1 to 15 of 19

Thread: Plan "B"

  1. #1
    Join Date
    Apr 2008
    Location
    Dayton Ohio
    Posts
    967

    Plan "B"

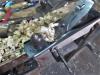
    Started working on a project, a Stanley 55 combination plane. A couple of the handles were broke, rust and plating peeling off. It's a mess. In order to restore this plane, I need to nickel plate it again. This means all the wood handles must be removed. Not an easy task. Stanley used steel pins inserted into just one side of the handles. So they needed to be extracted. I made a fixture to drill a small hole into the pins. Then a screw was inserted and the pins pulled. This same fixture will be used later.

    55 Pin Fixture 1.jpg

    Next I decided to clean up the main body and work on the handle. Plan "A" was to fix the handle and use again, but it would have been a noticeable fix. Decided to make a new handle out of walnut. Plan "B". (Note: This handle looked like a stained hardwood but did not match the fence handles at all, so I will replace them all with walnut).

    Several steps were needed. First I squared up a blank and used the bandsaw to cut a slot for the frame. Then I started to fit the angled frame. Once I had the blank fitted to the frame I moved it under the frame and marked the oval hand hold area onto the wood.

    55 Handle 1.jpg55 Handle 2.jpg55 Handle 3.jpg

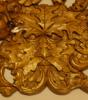
    Finally the rear of the handle, the horn, and the radiused areas were done. After a good sanding a couple coats of Teak oil were put on.

    55 Handle 4.jpg

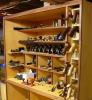
    I will need to make some new pins (later) but will use the fixture again to drill the holes in the handles. I plan on lining up the bit with the hole, slide the handles on and then drill the holes through the wood. Keeping with the original design the holes will not go all the way through.

    55 Pin Fixture 2.jpg55 Pin Fixture 3.jpg

  2. #2
    Join Date
    Jun 2010
    Location
    twomiles from the "peak of Ohio
    Posts
    12,193
    Looks good, so far...
    A Planer? I'm the Planer, and this is what I use

  3. #3
    Join Date
    Feb 2011
    Location
    Carlsbad, CA
    Posts
    2,230
    Blog Entries
    2
    well done--admire your high standards! Good luck with the metal working!

  4. #4
    Join Date
    Apr 2008
    Location
    Dayton Ohio
    Posts
    967
    Quote Originally Posted by Mike Allen1010 View Post
    well done--admire your high standards! Good luck with the metal working!
    I have no problem with metal working. Here is a picture of a couple Siegley combination planes I have been working on. Have a third one I am documenting the process of cleaning/polishing/nickel plating.

    Siegley Plated - A.jpg

  5. #5
    Join Date
    Sep 2007
    Location
    Longview WA
    Posts
    27,482
    Blog Entries
    1
    Nice work Eric. My #55, from ebay, came with a replaced handle.

    Stanley #55 - Handle Removed.jpg

    The person who did the deed didn't even bother to tap the holes for the screws.

    Stanley #55 Right Side View.jpg

    Since then the holes have been tapped and as they say, the rest is history.

    jtk
    "A pessimist sees the difficulty in every opportunity; an optimist sees the opportunity in every difficulty."
    - Sir Winston Churchill (1874-1965)

  6. #6
    Join Date
    Apr 2008
    Location
    Dayton Ohio
    Posts
    967
    Quote Originally Posted by Jim Koepke View Post
    Nice work Eric. My #55, from ebay, came with a replaced handle.

    Stanley #55 - Handle Removed.jpg

    The person who did the deed didn't even bother to tap the holes for the screws.

    Stanley #55 Right Side View.jpg

    Since then the holes have been tapped and as they say, the rest is history.

    jtk
    Mistakes and accidents do happen. The real saviors are the ones who can fix them. Good job Jim.

  7. #7
    Join Date
    Apr 2010
    Location
    Essex, MD
    Posts
    421
    Nice work Eric - Do you plan to copper-plate it first before nickel plating? I ask because I have an early 55 and where the nickel is worn off in places it's clearly copper plated beneath, apparently because the cast iron is porous and the copper was used to fill and smooth the surface before the nickel. I had wondered if you had figured a way to remove the old nickel (Maybe abrasives?) in order to replate the entire piece anew - in this case, the two fences or if you just plate the iron.
    Karl

  8. #8
    Join Date
    Apr 2008
    Location
    Dayton Ohio
    Posts
    967
    Quote Originally Posted by Karl Andersson View Post
    Nice work Eric - Do you plan to copper-plate it first before nickel plating? I ask because I have an early 55 and where the nickel is worn off in places it's clearly copper plated beneath, apparently because the cast iron is porous and the copper was used to fill and smooth the surface before the nickel. I had wondered if you had figured a way to remove the old nickel (Maybe abrasives?) in order to replate the entire piece anew - in this case, the two fences or if you just plate the iron.
    Karl
    There are several things to consider. First, Stanley (and others) did use copper first on some tools. Sometimes straight nickel. The nickel will stick to copper or iron/steel the same. So it's not an adhesion issue. There are times when using copper first can fill some of the porosity you mention. To be really effective the copper should be applied multiple times and sanded between plating's before a final polish before nickel. This will make the smoothest finish. It's also easier to polish the copper than the iron/steel. I think that is basically what Stanley was doing. A quick flash of copper, polished on some surfaces and then nickel plate followed with a final polish. They probably did not do this to every tool as the cost would be too high.

    I tend to polish the iron/steel and then nickel plate. Setting up the copper tank and an extra polish is time consuming. Turns a plating job into a multi-day event. I like to get a full days plating done instead of partial days as it costs money (electricity) to heat the solutions. Typically, I might plate each part for about an hour, sometimes turning it for coverage.

    When it comes to plating over existing nickel it must be re-activated with an acid before plating. There are also solutions to dissolve the nickel that do not damage the iron/steel. See https://caswellplating.com/

    There are times when I simply sand and polish existing nickel until it's smooth and then plate.

    Now for a tough question: What causes nickel to de-laminate? As nickel itself it fairly inert you are looking at mechanical stresses. The first most obvious one is if there is damage to the nickel and rust starts to form. Rust will keep creeping under the plating and must be removed before plating. (Nickel plating will not stick to rust or paint). Another cause of de-lamination is heat. The base metal, iron/stee, the copper, and the nickel all have different thermal expansion/contraction properties. The plating are thin enough to pass most temperatures straight on through, but if the temperature difference happens quickly or if the temperature is high, some delamination may occur. Now I don't have proof of this, but I think this temperature change causes microscopic cracks which allows moisture and therefore rust to form.

    So, do I think my plating will last? Yes, but not forever. The best thing to do is keep your tools protected with some kind of oil. Anything is better than nothing.
    Last edited by Eric Brown; 08-18-2023 at 11:04 AM. Reason: spelling

  9. #9
    Join Date
    Apr 2008
    Location
    Dayton Ohio
    Posts
    967
    Here are some updated pictures. I made new walnut handles for the fences and got the adjustable skate section cleaned and polished. Still need to plate and polish some more but I am happy with the progress. After I get this done, I still have four boxes of cutters to clean up. Need to maybe fix the wood box it came in too. Still deciding.

    55 cleaned half plated left.jpg

    55 cleaned half plated right.jpg

  10. #10
    Join Date
    Feb 2014
    Location
    Lake Gaston, Henrico, NC
    Posts
    9,093
    Gorgeous!! Those pictures are worthy of framing.

  11. #11
    Join Date
    Apr 2008
    Location
    Dayton Ohio
    Posts
    967
    Quote Originally Posted by Tom M King View Post
    Gorgeous!! Those pictures are worthy of framing.
    Thank you. It's a lot of work but I like to show what is possible.

  12. #12
    Join Date
    Sep 2007
    Location
    Longview WA
    Posts
    27,482
    Blog Entries
    1
    It is a much better job than some of the re-plating I've seen on ebay.

    jtk
    "A pessimist sees the difficulty in every opportunity; an optimist sees the opportunity in every difficulty."
    - Sir Winston Churchill (1874-1965)

  13. #13
    Join Date
    Jun 2010
    Location
    twomiles from the "peak of Ohio
    Posts
    12,193
    Makes my two Stanley 45s look downright plain, and boring...
    A Planer? I'm the Planer, and this is what I use

  14. #14
    Absolutely stunning!! Eric, I can’t imagine the number of hours you have invested, plus the broad skill set required to bring a project like this to fruition. Just wonderful!

    Left click my name for homepage link.

  15. #15
    Join Date
    Apr 2008
    Location
    Dayton Ohio
    Posts
    967
    Quote Originally Posted by John Keeton View Post
    Absolutely stunning!! Eric, I can’t imagine the number of hours you have invested, plus the broad skill set required to bring a project like this to fruition. Just wonderful!
    Well John, it does take a lot of different skills and experience. However, even I run into unforeseen problems. That is why the title of this blog post was "Plan B". I always look a step or two ahead and determine if I might run into a problem, and if I do, what then. I was recently working on a 1890's combination plane by Siegley that needed some new thumbscrews as several were missing. They were an unusual thread of 1/4-24 and were cast iron. Nobody carries this size anymore. I contacted a manufacturer and was able to purchase thumbscrew blanks of malleable iron. Using those I was able to thread them and clean them up from the rough castings. They aren't a perfect match, but I don't want to mislead anyone either. Some things are beyond my skillset, but the important thing is to recognize these limits and figure out the best way to work around them. Sometimes I need to buy a tool. Other times I seek outside help. I did a plating job for someone that involved a bunch of cast iron pieces that had been painted. After removing the paint, I saw some of the castings had fractures. I could have tried to silver solder them, but I know a good weld shop that could do the job better, with less risk. I bought them a bunch of cookies and they did the brazing. I cleaned up the braze and nickel plated. Can't tell anything was fixed. So, there are times when you try to extend your abilities and fail, but you learn from them. There are a few people on this website that want more woodwork and as this plane required new handles I decided to post it. Glad you found it stunning.

Posting Permissions

  • You may not post new threads
  • You may not post replies
  • You may not post attachments
  • You may not edit your posts
  •