Not really an issue, with the Oak, and Maple top.....kind of frames the oak field.
Has three kinds of Maple...spalted, curly, and birdseye......and the oak top. If made out of all the same boards, would be rather bland, and boring..


 [OP]
Contributor
[OP]
Contributor
Not really an issue, with the Oak, and Maple top.....kind of frames the oak field.
Has three kinds of Maple...spalted, curly, and birdseye......and the oak top. If made out of all the same boards, would be rather bland, and boring..
[OP]
Contributor
There is just enough sap wood along that back edge, to complete a white wood border in the lid.
Had a bit more Maple to cut to lengths...
IMG_2122 (640x480).jpg
Maybe later, I can install the hinges?
IMG_2123 (640x480).jpg
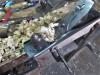
Plank was a bit too long for the Langdon.....went to the "other" crosscut saw..
IMG_2124 (640x480).jpg
Disston D-8.
IMG_2125 (640x480).jpg
Used that saw to cut done a 1/2" x 10" Poplar plank...had a use for it as well..
IMG_2126 (640x480).jpg
A 1 x 4 was a bit too wide....and I needed a rail made, to match the other rail. Rip fence worked great for simple rip cuts...not worth a ...for resaw.
Some how mangled my way through the NOW 1 x 3.....into 3/8" thick slabs...
IMG_2128 (640x480).jpg
Langdon made a couple cuts. Poplar was tapered...in all the wrong directions.....we have ways..
IMG_2129 (640x480).jpg
Cambered jack to take all the high spots down....then the smooth plane...
IMG_2132 (640x480).jpg
This will be the "bottom" of a tray. The tray slides on two rails. Need to set the rails low enough in the blanket chest, so the top of the tray misses the lid.
Stay tuned....joinery may get done...tomorrow...
[OP]
Contributor
Took the day off, today...went rust hunting instead....May try to cut some dovetails...Thursday? Bottom gets a rebate all the way around, then wil be nailed in place....I'll let it wear, instead of the Maple. I can always replace the bottom, that way, if need be.
[OP]
Contributor
Had errands to run, a plane to rehab....and 2 hours sleep last night.....didn't feel like cutting any wood....Doctor visit Friday.....maybe Saturday I can finish that tray?
rehab a plane?
IMG_2158 (640x480).jpg
The one I picked up this afternoon....
[OP]
Contributor
OK, a Biopsy was done on a spot on my right forearm.....shot to numb the area is wearing off...
Got a bit bored sitting around..decided to clean things up on the bench...
Air hose to de-dust a few items....
IMG_2165 (640x480).jpg
Some Dunlaps, and Anant A4, and the newest Stanley....Found a place to stash the Dunlaps,a 035, and the A4..
IMG_2167 (640x480).jpg
As for the Stanley No. 4c, Type 16?
IMG_2166 (640x480).jpg
Completes your basic starter set...a #4c , a #5, and a #7....
Got out a few tools..
IMG_2161 (640x480).jpg
There is a small dovetail bit...used it to set the angle on the sliding bevel. Got to puttering around..
IMG_2162 (640x480).jpg
And one corner of the tray is about done.
IMG_2169 (640x480).jpg
Took a few extra tools, though.
IMG_2168 (640x480).jpg
Looks good enough to me. 1/2" Hard Maple.
IMG_2170 (640x480).jpg
But at least the bench is a little cleaner....
Forearm started hurting, time to stop for the day.
Stay tuned...
[OP]
Contributor
Busy morning...then the Boss wanted to go to the store....
Metal working: Adapted a few hinges....using a grinder for a bit..
IMG_2171 (480x640).jpg
Three were needed. The fourth one shows the "before" look. Put the lid in the vise..
IMG_2174 (640x480).jpg
Mark, pilot holes drilled, screws used. Set the lid aside, set the case on the bench. Set the lid to where I could install the hinges onto the case...clamps help keep things from morning around
Finally got the chest back on it's own four feet..
IMG_2175 (640x480).jpg
"Test Drive" to make sure things work...lid even closed nicely..
IMG_2176 (640x480).jpg
Ok, Rails were next. Got them cut to length, and marked where the counter sunk holes will go..
IMG_2179 (640x480).jpg
And used a couple "cordless" drills..
IMG_2177 (640x480).jpg
Millers Falls 6" and a Stanley 6" sweep. Leave them set up, just for jobs like this.
IMG_2180 (640x480).jpg
Time to make some saw dust...stay tuned..BRB with episode 2 of today's follies..
[OP]
Contributor
Ok, here we go....
Close up of my "dovetail saw"
IMG_2181 (640x480).jpg
Disston No. 4 11ppi, 14" filed rip.
IMG_2182 (640x480).jpg
Once the saw is done, a chisel removes the waste....(trying to save my bench's top, added a poplar "pad")
IMG_2183 (640x480).jpg
Used the pins the lay out the tails. Bandsaw to remove the waste. Worked my way around until all four corners were done
IMG_2184 (640x480).jpg
Had just laid the panel for the tray's bottom onto the sides....and was getting ready to rebate the panel...when the Boss said it was time to go to the store...grrrrr...
IF I get a bit of free time later, and the forearm ain't hurting too bad....I might get the bottom installed. Then I can lay out how far down to set the rails, and install them....
Stay tuned...
[OP]
Contributor
Tray MIGHT get a center divider/handle? Would need to do some stopped dados. May glue up the sides, then add the dados.....then nail the rebated bottom in place, no glue.
Hole in the forearm is about the size of a dime.....and with the hairy arm...kind of hard to keep it covered with a bandaid...
Maybe later this afternoon-ish, I can try a little more work on the tray?
Stay tuned..
Member
Out of curiosity, about what would you pay for the Dunlaps? There are several different ones at a local antiques place, one similar to a Stanley #7, which is a size I need. It looks in good shape; I need to take it apart and check it, though. They want about $60 for that one, $20 or so for some similar to #4, #5, etc.Originally Posted by steven c newman

Hope the biopsy turns up good, and that your arm heals quickly.
Member
Love the Disston #4!
[OP]
Contributor
$60 sounds good for a #7......
Those #3 Dunlaps in the picture? Around 5-10 dollars....
Member
Thanks. Much appreciated.
Member
it's looking great
[OP]
Contributor
Getting a bit long...decided to just complete the tray as is....
IMG_2186 (640x480).jpg
Came out of the clamps a while ago,,,,dovetails were trimmed flush. Bottom was cut to fit inside the box.
IMG_2187 (640x480).jpg
And just nailed in place, no glue. Then used the tray to mark out where the rails needed to be, and installed them..
IMG_2188 (640x480).jpg
Then a test drive along the rails. May add a handle at a later date....right now, doen't really need one. Biggest thing was IF the lid could close, without hitting the tray...
IMG_2190 (640x480).jpg
So...next I'll need to haul this thing upstairs, where I will have enough room to add the Shellac, and the clear gloss top coat..
IMG_2192 (640x480).jpg
Inside, and out. Just about done....
 Contributor
Steven, I have a question. With all of the things you build you must either give a lot of things away, take things apart and recycle to build something else, or have a huge warehouse you haven't told us about. Followers are anxious to know!
Jim
 Posting Permissions

 Reply With Quote
