Page 1 of 2 12 LastLast
Results 1 to 15 of 86

Thread: Maple Inventory, next project?

Hybrid View

Previous Post Previous Post   Next Post Next Post
  1. #1
    Join Date
    Jun 2010
    Location
    twomiles from the "peak of Ohio
    Posts
    12,184

    Maple Inventory, next project?

    Ok, have a bit of both Curly Maple and plain old Maple left over. Need to find some ideas to use them up...
    IMG_1868.jpg
    Have this panel. This is how it came home..3 board glue up, 15" wide x 31" long.....top?

    There is a pile in the shop..
    IMG_1871 (640x480).jpg
    Mostly Maple. Walnut is down to small bits and pieces (trim?) the rest is Pine and Poplar
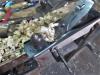
    Maple seems to be in this size..
    IMG_1872 (640x480).jpg
    1 x 6 and 1 x8 around 2' long or so. Nice stack..
    IMG_1878 (640x480).jpg
    There is ONE board that seems to say "Drawer Front"
    IMG_1880 (640x480).jpg
    Wild grain. There is also what remains of another wide plank
    IMG_1879 (640x480).jpg
    Yep, that split finally came apart. There are 5/4" thick.....stiles for ...?

    The Poplar can be sides for small drawers. Pine can be for frames inside a case. Or just more jigs.

    may just sleep on this a while...I think I need a day off, after that Walnut & Cherry Box project....Single Brain Cell Sketch Up is "Off-line" right now.

    Stay tuned....may come up with something to cobble together...

  2. #2
    Join Date
    Jun 2010
    Location
    twomiles from the "peak of Ohio
    Posts
    12,184
    Thinking of ripping that thick slab into stiles.....should be able to get four out of it? Maybe sit that glued up panel on top? Maybe a drawer under it? Or...small Blanket Chest atthe foot of a bed? One that seems to think it is a drawer front..can be made into a fancy end panel ? Bread board ends on the lid? Add a few trim pieces of what is left of the Walnut?

    Will see when I get back to the shop. Hmmmm, Frame &Panel case? Breadboards? One or two panels across the front and backs...? Maybe a small "keepsafe" box, just under the lid?

    This might take a while....hope it doesn't get too boring.....

  3. #3
    Join Date
    Jun 2010
    Location
    twomiles from the "peak of Ohio
    Posts
    12,184
    IF nothing gets in the way tomorrow...like the Boss having other plans for me.., I MIGHT meander down and get a start on this Maple project. Maybe see how I am fixed for building the frames..to hold a few panels. Might try a few "new" things out...we'll see. Don't have a way to do video in the shop.....unless someone shows up to do that...shop is open just about every afternoon...

  4. #4
    Join Date
    Jun 2010
    Location
    twomiles from the "peak of Ohio
    Posts
    12,184
    Set the resaw jig to 1-3/4" away from the blade. Ran the 5/4 slab through, and a couple other boards. Need to size them for length, next. Then I can figure out the sizes needed for the raised panels...May have to do a few panel glue ups...Sticking with a single panel on the ends, and two ( maybe..) panels for the front, and for the rear. May work on the frames a while, tomorrow..

  5. #5
    Join Date
    Jun 2010
    Location
    twomiles from the "peak of Ohio
    Posts
    12,184
    Hand plane WORK ( and I am soaked..) today. All frame parts for the front and back frames have been jointed, and the faces smoothed. ( pictures later this evening)

    May need a stick or three more, to finish the build. Back is now stiffened up. Need to find a bit of Lunch...

    Had to rip a thin slice off of one board..so it would match the ones it will connect to...counting width of the cut....1/8" total removed....then planed flat.

  6. #6
    Join Date
    Jun 2010
    Location
    twomiles from the "peak of Ohio
    Posts
    12,184
    Shop Cat kicked me out of my chair!
    IMG_1889 (640x480).jpg
    So, I guess I should do a little work in the shop?
    IMG_1890 (640x480).jpg
    Resaw jig set to 1-3/4"from the blade. Shoplight to help me SEE the lines.
    IMG_1891 (640x480).jpg
    Results. Needed to clean the bench off, and build a jig....of some sort
    IMG_1892 (640x480).jpg
    These needed the edges jointed....tried the 5-1/2 Stanley...
    IMG_1893 (640x480).jpg
    But it was a tad too "tippy"....went with a Millers Falls No. 14 Jack instead.
    IMG_1898 (640x480).jpg
    these also had a bit of stain on them...readjusted the jig, and removed the red stuff..
    IMG_1899 (640x480).jpg
    Needed smoothed anyway....there were a few long rails to plane down....wavy saw cuts and such...
    IMG_1901 (640x480).jpg
    Rails are almost 30" long, so a longer plane was used.
    Out of room for pictures....BRB

  7. #7
    Join Date
    Jun 2010
    Location
    twomiles from the "peak of Ohio
    Posts
    12,184
    That long jointer plane?
    IMG_1902 (640x480).jpg
    Ohio Tool Co. No. 0-7.....I also tried a "different" jointer plane..
    IMG_1903 (640x480).jpg
    A No. 81.....Did ok on the Maple..
    IMG_1904 (640x480).jpg
    So..now all I need to make are a few raised panel blanks. Parts for the front and back frames are ready to be grooved, and mortise and tenoned. End frames may get cobble after that.

    Now, IF I can just get my chair back....

  8. #8
    really nice looking wood.

  9. #9
    Join Date
    Mar 2006
    Location
    Austin Texas
    Posts
    1,957
    Said it before - you are a dynamo Steven C, but that was one serious looking cat and I would not challenge it for the chair. Surely there are other chairs you can use.
    David

  10. #10
    Join Date
    Jun 2010
    Location
    twomiles from the "peak of Ohio
    Posts
    12,184
    He merely wants a lap to snooze the afternoon away on...

    Yard sales this morning...spent $10..
    IMG_1907 (640x480).jpg
    Pair of pipe clamps. Came in handy, too
    IMG_1906 (640x480).jpg
    Picked these up at Aldi's last night....will get them tuned up, later..
    IMG_1909 (640x480).jpg
    Glue up for either the front or back panel..
    IMG_1911 (640x480).jpg
    And the other panel. Only had 5 pipe clamps on hand, until the two from the yard sale arrived..
    IMG_1912 (640x480).jpg
    Cut out the foot profiles. Will see how the side ones turn out, later.
    IMG_1916 (640x480).jpg
    Center divider, and a top and bottom rail. Awaiting to see how the panels turn out, before any grooves get made.
    IMG_1915 (640x480).jpg
    Used this old Bailey No.7c today....back is getting stiff. Will call it a day..

  11. #11
    Join Date
    Jun 2010
    Location
    twomiles from the "peak of Ohio
    Posts
    12,184
    May need to go and get a stick or two of Maple....need a bit of 1 x 4 stock. Maybe build a webframe to support the bottom panel. I suppose Pine will do for that.

    Maple Chest this time around....made one in Walnut a few years ago....as a tool chest! Has since been recycled into a "Winter Clothes" storage...
    tool chest 1.jpg
    Used to hit my shins all the time...
    IMAG0007.jpg
    At one time, it was cleaned up...
    IMAG0003.jpg
    Just a tool chest, back then. Light coloured panels are Sycamore.

  12. #12
    Join Date
    Aug 2010
    Location
    USA
    Posts
    5,582
    Quote Originally Posted by steven c newman View Post
    Remember, I work IN a cellar, where the Laundry Room is......I build snug as I can......then let things shrink IF they want...
    SDC12229.jpg
    Made over twenty years ago, was made from the floor boards of a One Room School House that was being torn down. Still going strong.
    The panels on your new (20 yr old) example look different regarding the panel fit to the groove. Of course I can't see the detail very clearly.

    Regardless, do you find the panels fit much differently between July and January?

  13. #13
    Join Date
    Jun 2010
    Location
    twomiles from the "peak of Ohio
    Posts
    12,184
    Nope. Panels were done with a Tablesaw, back then.....out in a drafty, old Pole Barn. Like using handplanes better.

    Been using a blockplane to ease the edges of the grooves...
    champfered.jpg
    Something like this.....allows the panel to settle into the bottom of the grooves better...
    panel fitted.jpg
    Doesn't take all that long to do, either. Would be nice if there was a cutter that could do the groove and bevel the corners all at once...Maybe Derek could "design" one?

  14. #14
    Join Date
    Jun 2010
    Location
    twomiles from the "peak of Ohio
    Posts
    12,184
    I suppose, today being Tuesday...I should go to the shop.....maybe after lunch? Have one more raised panel to do, and a few tenons and mortises to cobble up.

    Debate is now on how to join the corners.....T&G again.....or, drill a bunch of counter-bored holes, and use screws and glue, then cut a bunch of Walnut plugs....we'll see.

    Stay tuned...you too, Pat.

  15. #15
    Join Date
    Aug 2010
    Location
    USA
    Posts
    5,582
    Quote Originally Posted by steven c newman View Post
    I suppose, today being Tuesday...I should go to the shop.....maybe after lunch? Have one more raised panel to do, and a few tenons and mortises to cobble up.

    Debate is now on how to join the corners.....T&G again.....or, drill a bunch of counter-bored holes, and use screws and glue, then cut a bunch of Walnut plugs....we'll see.

    Stay tuned...you too, Pat.
    Hey, I'm always tuned in

Posting Permissions

  • You may not post new threads
  • You may not post replies
  • You may not post attachments
  • You may not edit your posts
  •