As something of a newbie, it seems to be that after sharp tools, the most important thing in executing joinery is to get a nice, clean, accurate layout. I don't see it talked about as much as other aspects of woodworking, but there are obviously a lot of skills and techniques to be learned.
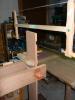
Along those lines, I'm curious how you guys deal with marking something like a mortise (say where a leg goes into a workbench top) when it is too far from a reference edge to use a gauge? Ideally you would use a mortise gauge with the same width setting for the mortise and tenon, but if you can't get the gauge out to the mortise, would you just measure with a ruler/tape? I think that would be fine for setting the first line of the mortise from the edge, but how do you get the exact spacing between the first and second lines so that the mortise width exactly matches the tenon? Without relying on sighting down a ruler perfectly?
I have a couple of ideas but I'd like to see what other people do. Maybe I'm over-thinking it and should just use the ruler?
Also, if anyone has any advice in general on marking/measuring, besides what I'm asking about, I'd be happy if that were shared in this thread.
Thanks,
Robert

 Reply With Quote